

Feeders for Chickens: A Practical Buyer's Guide
You find the problem at dusk. Feed trails across the mud, the bag has a ragged hole, and a rat vanishes beneath the coop before you can grab a flashlight. Inside, the hens are scratching half their ration into the bedding while the smallest birds wait at the edge of the trough.
That isn't bad luck. It's a feeder problem. The right feeder controls waste, access, moisture, contamination, and pest pressure, so choosing among feeders for chickens is really a flock-management decision, not a shopping decision.
Why Your Feeder Choice Matters More Than You Think
An open tray makes feed easy to reach, but it also makes it easy to billow onto the ground. Chickens step through it, scratch around it, and scatter it beyond the feeder. Wet ground then turns spilled ration into a pest attractant and a hygiene problem.
A feeder with a torn lid or exposed hopper creates a second failure. Wild birds can reach the feed, rain can soak it, and rodents get a dependable food source after dark. Moving the feeder into the coop helps, but it won't fix a design that birds can overturn or scratch empty.
The flock problems a feeder can create
The wrong setup commonly produces several problems at once:
- Uneven access: Dominant hens guard a short trough while timid birds wait or eat less.
- Excess waste: Low pans and exposed feed let birds shake or rake ration onto the floor.
- Contamination: Droppings, bedding, mud, and wet feed meet when the feeder sits too low or too close to the roost.
- Pest pressure: Rats, mice, squirrels, and wild birds follow spilled feed.
- Age competition: Chicks struggle to reach adult feeders, while adults crowd a small starter tray.
USDA Agricultural Research Service work makes the waste issue concrete. In commercial broilers, KON feeders produced more spillage than C2 feeders because birds shook them more forcefully, while the lower pan height and feed position closer to the edge increased the risk of loss. The same research describes a capture unit that measured spillage recovery with an error as low as 3–4% for older birds on pelleted feed (USDA ARS feeder-spillage research).
Practical rule: If feed is on the ground every day, adjust the feeder before you blame the flock.
A good feeder slows waste without blocking access. It keeps the ration dry, gives weaker birds a fair chance, and lets you inspect consumption without guessing how much disappeared into the bedding. The useful choices are gravity, trough, hanging, nipple-style access systems, and anti-waste treadle designs. Their success depends on the flock, the enclosure, and the predators around it.
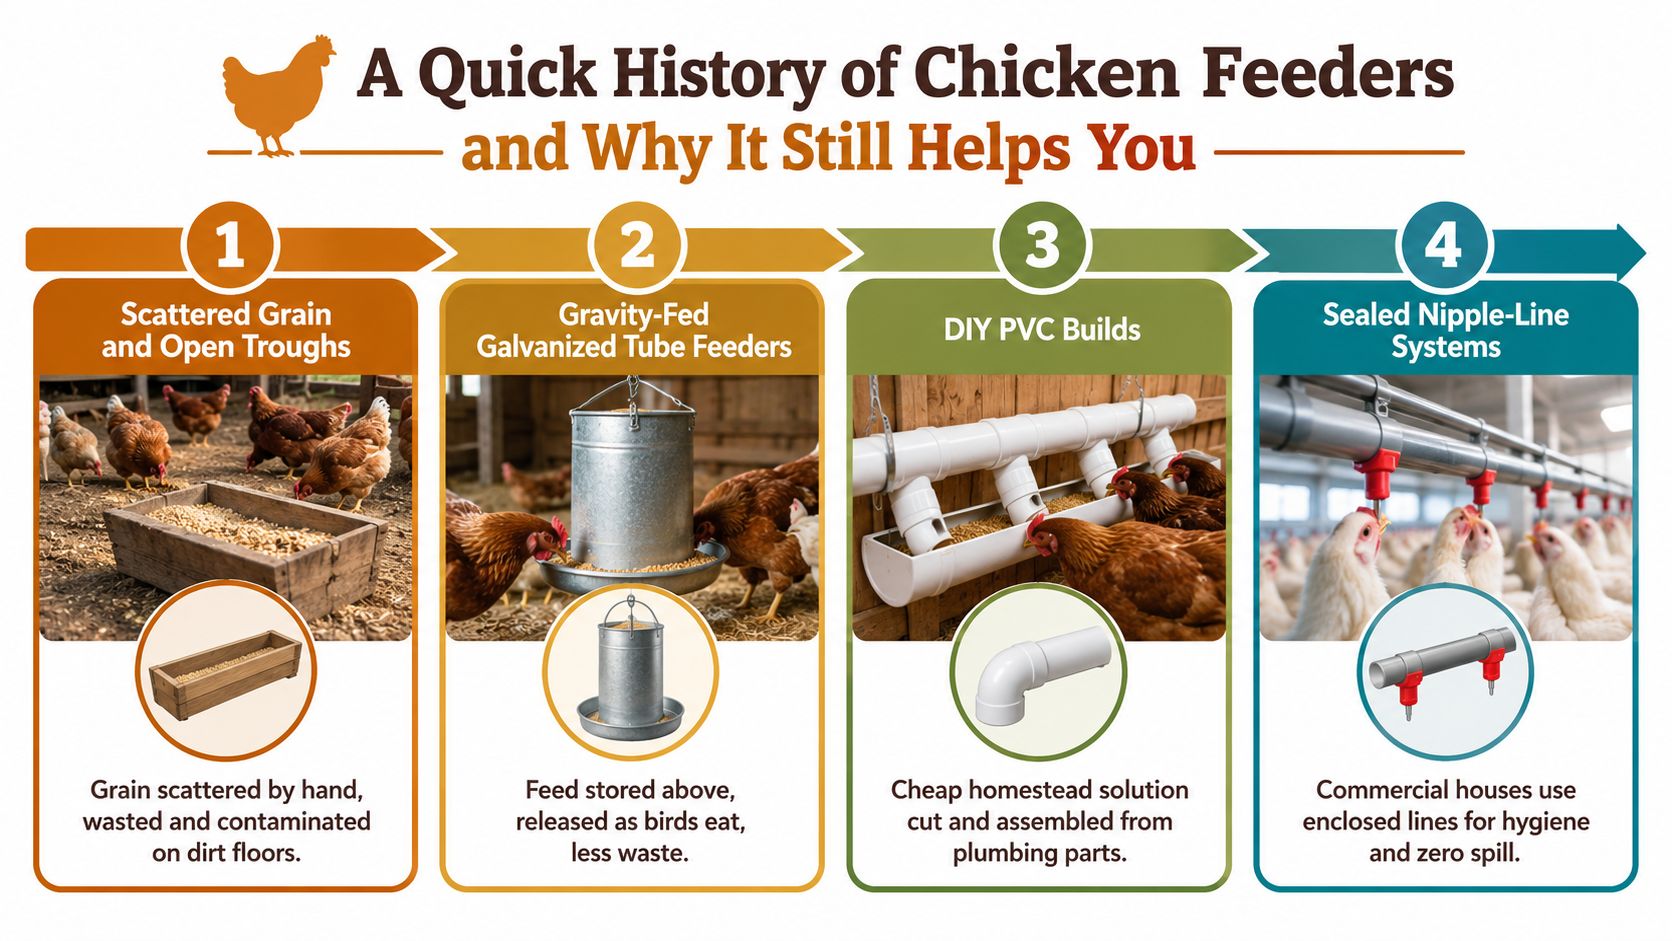
A Quick History of Chicken Feeders and Why It Still Helps You
Early poultry keeping relied on scattered grain and open wooden troughs. That arrangement suited small flocks, but it made every feeding round dependent on the keeper and left ration exposed to dirt, weather, rodents, and wild birds.
Commercial systems developed toward storage above the birds, controlled release, and less direct contact with the floor. Big Dutchman's company history records that it introduced the world's first automatic chicken feeder in 1938, and that the design later became the first automated poultry feeder produced on a commercial scale after being sold in 1949 (Big Dutchman company history).
Each modern design solves an old problem
Gravity-fed galvanized tubes store feed above the access point and release it as birds eat. Hanging models keep the pan away from bedding. PVC builds let homesteaders copy the same vertical-storage principle with inexpensive plumbing parts.
Sealed nipple-line systems apply the same logic to water rather than dry ration. They enclose the supply and reduce contact with dirt, droppings, and spilled material. A backyard keeper doesn't need a commercial house to use the lesson: put the supply above the mess, limit exposure, and make cleaning possible.
The history also explains why no single feeder suits every coop. A mobile tractor needs light equipment. A permanent run may justify galvanized metal. A rat-heavy property needs stronger exclusion than a closed urban yard. A mixed-age flock needs separate access rather than one oversized adult feeder.
The poultry equipment market reflects that shift toward managed feeding. One report values the poultry feeder market at USD 3.5 billion in 2024 and projects USD 5.2 billion by 2033, with a 5.2% CAGR from 2026 to 2033 (poultry feeder market report). Those figures are projections and market estimates, not a reason to buy a complicated feeder. They show that feed control has become a central equipment concern across commercial and backyard systems.
The Five Main Types of Feeders for Chickens Compared
The best feeder is the one that fixes your largest problem. If your flock wastes feed, prioritize a controlled pan. If rats eat at night, prioritize access control. If chicks and adults share space, prioritize age separation.
| Feeder Type | Waste Control | Best Flock Size | Age Range | Main Drawback | Best For |
|---|---|---|---|---|---|
| Gravity tube | Good when raised and adjusted | Small to medium | Growers and adults | Plastic can be chewed or cracked | Simple daily ration |
| Open trough | Fair to poor | Small flocks under supervision | Chicks and adults with separate sizing | Easy to scratch through and contaminate | Short feeding periods |
| Hanging feeder | Good | Small to medium | Growers and adults | Can swing, tip, or be reached by pests | Covered coops and runs |
| Ported or nipple-style access system | Very good when correctly installed | Medium to large | Mostly growers and adults | Ports can limit access or freeze in cold weather | Controlled, cleaner feeding |
| Anti-waste treadle feeder | Excellent for pest exclusion | Small to medium | Trained growers and adults | Young birds may fear the pedal | Rat, raccoon, and wild-bird pressure |
Gravity feeders
A gravity feeder is the practical default for many backyard flocks. Feed drops from a hopper into a pan as birds eat, and the closed body protects the reserve from casual scratching. Choose one with a stable base, a lid that seals properly, and removable parts.
Its weakness is predictable. Rats can chew thin plastic, and a feeder placed directly on the ground still collects bedding and moisture. Raise it and inspect the feed lip rather than assuming the hopper itself solves waste.
Trough feeders
Troughs give every bird a visible feeding edge, which helps when chicks need quick access. They also expose more ration to scratching, droppings, and weather. Open troughs work best when you can supervise feeding and remove them before rain or nighttime pest activity.
Hanging feeders
Hanging a feeder reduces tipping and keeps the pan above the bedding. The chain must be secure, and the feeder shouldn't swing wildly when birds push against it. A hanging model suits a covered run, but it isn't automatically predator-proof. A rat can still reach exposed feed if the pan sits low.
Ported and nipple-style systems
Ports restrict how birds reach the ration and can reduce billing out feed. Nipple-style systems are more common for water, but the broader design principle is useful: controlled access reduces contact and spillage. Young chicks may need a lower, simpler feeder while they learn the system, and cold weather can freeze exposed liquid lines.
Treadle feeders
A treadle feeder opens when a chicken steps on the pedal and closes when it leaves. This is the strongest choice where raccoons, opossums, rats, or wild birds raid the ration. The trade-off is training. Nervous pullets may avoid the pedal, and a badly adjusted mechanism can trap or exclude birds.
Sizing Your Feeder to Flock Size and Age
A feeder that holds plenty of ration can still fail at breakfast. If one assertive hen guards the only feeding edge, smaller birds wait, scatter feed, or eat less than they need. Size the setup around access, then choose enough capacity for your refill routine.
Utah State University Extension recommends about 1 linear inch per chick and 2 to 3 linear inches per adult bird. It also advises positioning the feeder around the chickens' mid-to-upper breast level and protecting feed from moisture and wild birds (Utah State Extension backyard chicken guidance). Use that space as a starting point, not a reason to crowd every bird onto one narrow line.
Match the feeder to the age group
Chicks need a shallow tray with a low lip. They should reach starter feed without climbing into a deep adult pan. Keep chick and adult feeding areas separate when possible. An adult can empty or foul a small chick tray quickly, while an undersized chick may struggle to reach an adult feeder.
Growing birds need adjustable height. Raise the feeder as their backs rise, keeping the feed lip near back height. This limits scratching and billing feed onto the floor. Breed size changes the correct setting, so adjust it by watching the flock rather than trusting a fixed product label.
| Flock Size | Recommended Trough Length | Hopper Capacity | Ports/Access Points |
|---|---|---|---|
| Small flock | Follow the adult linear-space rule and avoid one blocked access point | Hold enough for your usual refill routine | At least one accessible port per bird when ports are used |
| Medium flock | Extend the trough or split access between stations | Reduce frequent refilling without letting feed go stale | Use multiple ports or separated feeding points |
| Large flock | Distribute trough space instead of creating one crowded line | Choose controlled access with practical inspection points | Set several access zones apart |
Treat hopper capacity as reserve storage, not an excuse to leave feed unchecked. A large hopper can hide damp, caked, or stale ration. Smaller capacity works better when it keeps feed dry and lets you inspect consumption often.
Treats and supplements need the same access planning. Spread them across more than one feeding point if dominant birds monopolize them, and avoid using a single treat pan for a mixed-age flock.
USDA ARS research on feeder space in broilers found that access design affects feeding behavior (USDA ARS feeder-space research). If birds bunch together, shove others aside, or leave a timid bird waiting, add access points before adding hopper capacity.
Plastic, Metal, or DIY Materials Compared
Material determines how often you replace the feeder, how easily you scrub it, and how well it survives weather and rodents. Don't buy based on appearance alone.
Plastic is the sensible choice for portable tractors, brooders, and keepers who clean often. It's light, inexpensive, and easy to disassemble. It can become brittle in sunlight, crack with age, or attract chewing damage when rodents can reach the hopper. It handles dry ration, grit, and oyster shell well when kept clean. Fermented feed demands more frequent washing and complete drying because residue clings to seams.
Metal is my pick for a permanent run. Galvanized or sheet-metal feeders withstand rough handling and are harder for rodents to damage. They cost more and weigh more, and rust usually starts at seams, fasteners, or damaged coatings. File sharp edges before use and inspect joints after wet seasons. Metal is suitable for dry feed, grit, oyster shell, and carefully managed moist feed, provided it can be emptied and cleaned fully.
DIY works when you understand its maintenance burden. PVC can make a useful vertical feeder, and sealed wood can produce a custom trough for an awkward coop. Wood needs tight joints and a food-safe sealant, or it will absorb moisture and hold organic residue. Build quality determines whether a homemade feeder is a smart budget solution or a pest-access tunnel.
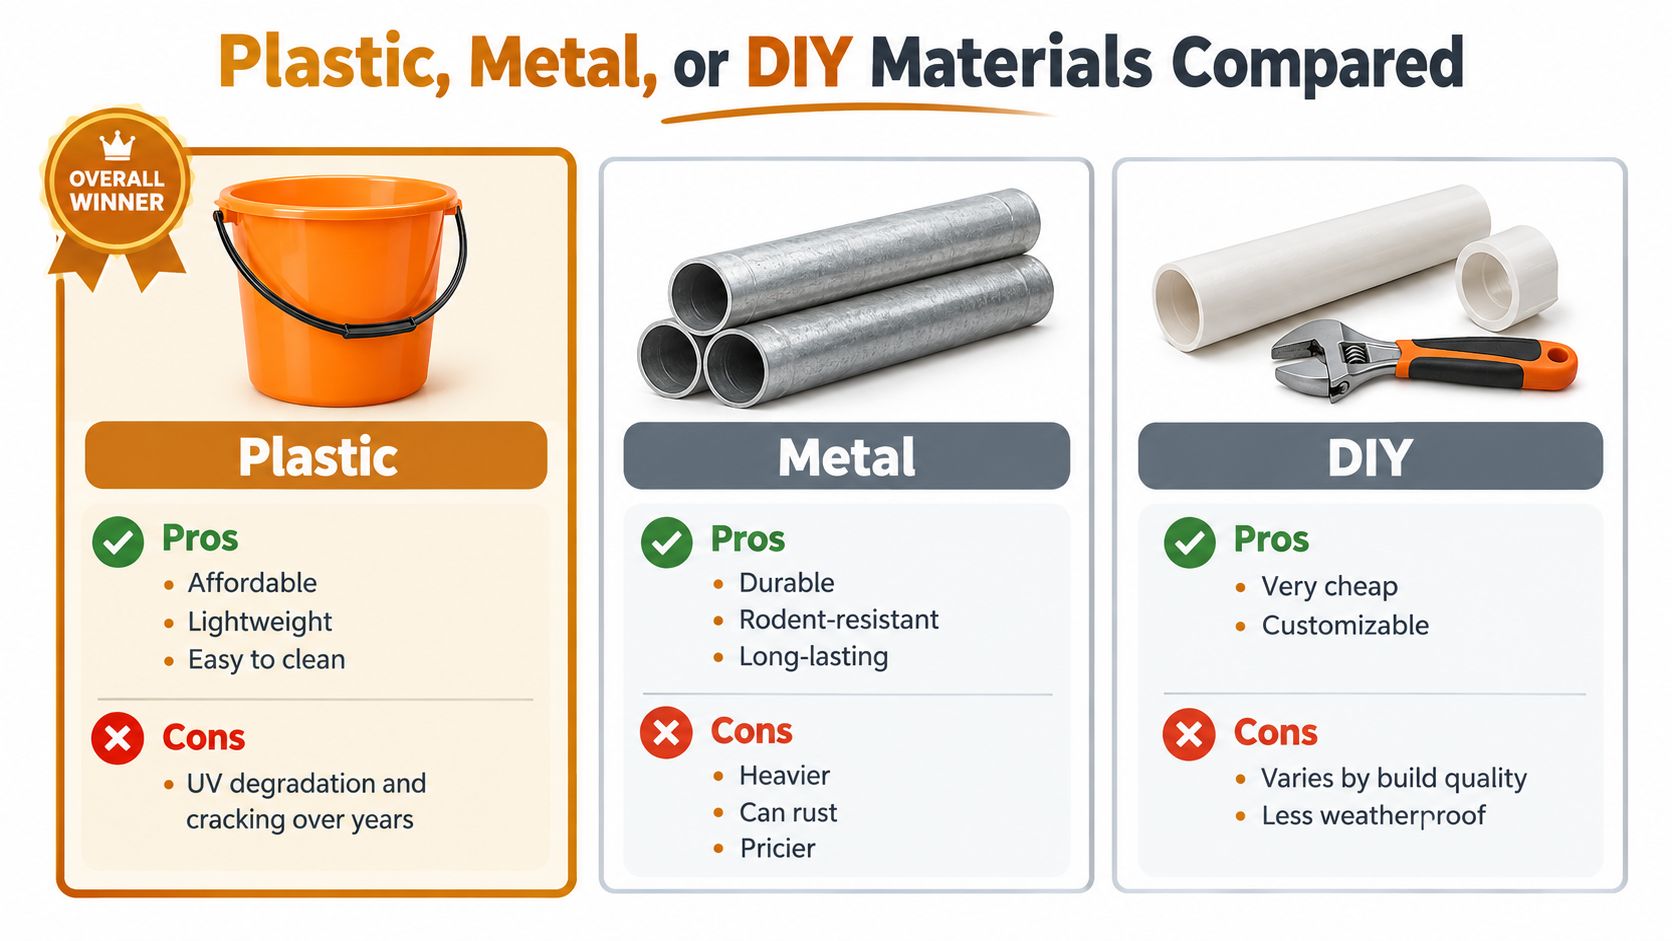
My ranking: Choose metal for a permanent, pest-prone setup, plastic for mobility and easy cleaning, and DIY only when you're willing to inspect and repair it.
For a simple homemade build, use this chicken feeder construction guide as a starting point, then modify the height and access openings for your flock. A homemade feeder still needs a lid, drainage, stable mounting, and edges that won't cut a bird.
A short demonstration can help you judge whether a DIY layout fits your coop:
Placement, Height, and Predator-Proofing Your Setup
A feeder can waste less feed and still fail if it sits in the wrong place. Put it under a roof or rain hood, away from the roost, and on a firm surface that keeps spilled feed out of mud.
Set the feeder lip near the birds' back height. This reduces the wing and foot movement that scatters feed. Chicks and growing pullets need a removable platform or adjustable stand, not a permanently lowered adult feeder. Raise the support as they grow.
Use the birds' size and posture as your guide. The opening should let them eat comfortably without climbing into the feeder. Check the setup after each flock change, especially when young birds share space with adults.
Use this placement plan:
- Shelter the ration: Cover open pans and troughs with a roof, rain hood, or covered run. Wet feed spoils and encourages clumping.
- Separate feeding from roosting: Keep the feeder at least 3 feet from the roost to reduce contamination from droppings. This spacing also appears in practical feeder-placement guidance from Aosom.
- Distribute access: Add another station if a dominant hen can guard the entire ration. Two modest stations often work better than one large feeder.
- Raise the base: Place hoppers on pavers or concrete instead of bare soil. Seal the gap underneath so rodents cannot nest there.
- Protect the chain: Use rat guards or enclosed hanging hardware where rodents can climb.
- Use a treadle where needed: Raccoon and opossum pressure calls for a closing mechanism. An uncovered pan gives them easy access.
- Keep water elsewhere: Put water on the opposite wall so splashes do not dampen the ration.
- Separate grit and oyster shell: Provide dry, dedicated containers rather than mixing free-choice minerals into the complete feed.
Squirrels require exclusion, not just a higher feeder. Combine a secured run, a covered food station, and controlled access. This guide to keeping squirrels away from chicken feed explains practical ways to limit their access.
Watch the flock for a full day after moving the feeder. If one hen stands guard, birds crowd into one corner, or feed keeps appearing below the pan, change the position or add another access point. A good setup makes orderly feeding the easiest behavior.
Using Treats and Supplements Without Sabotaging the Feeder
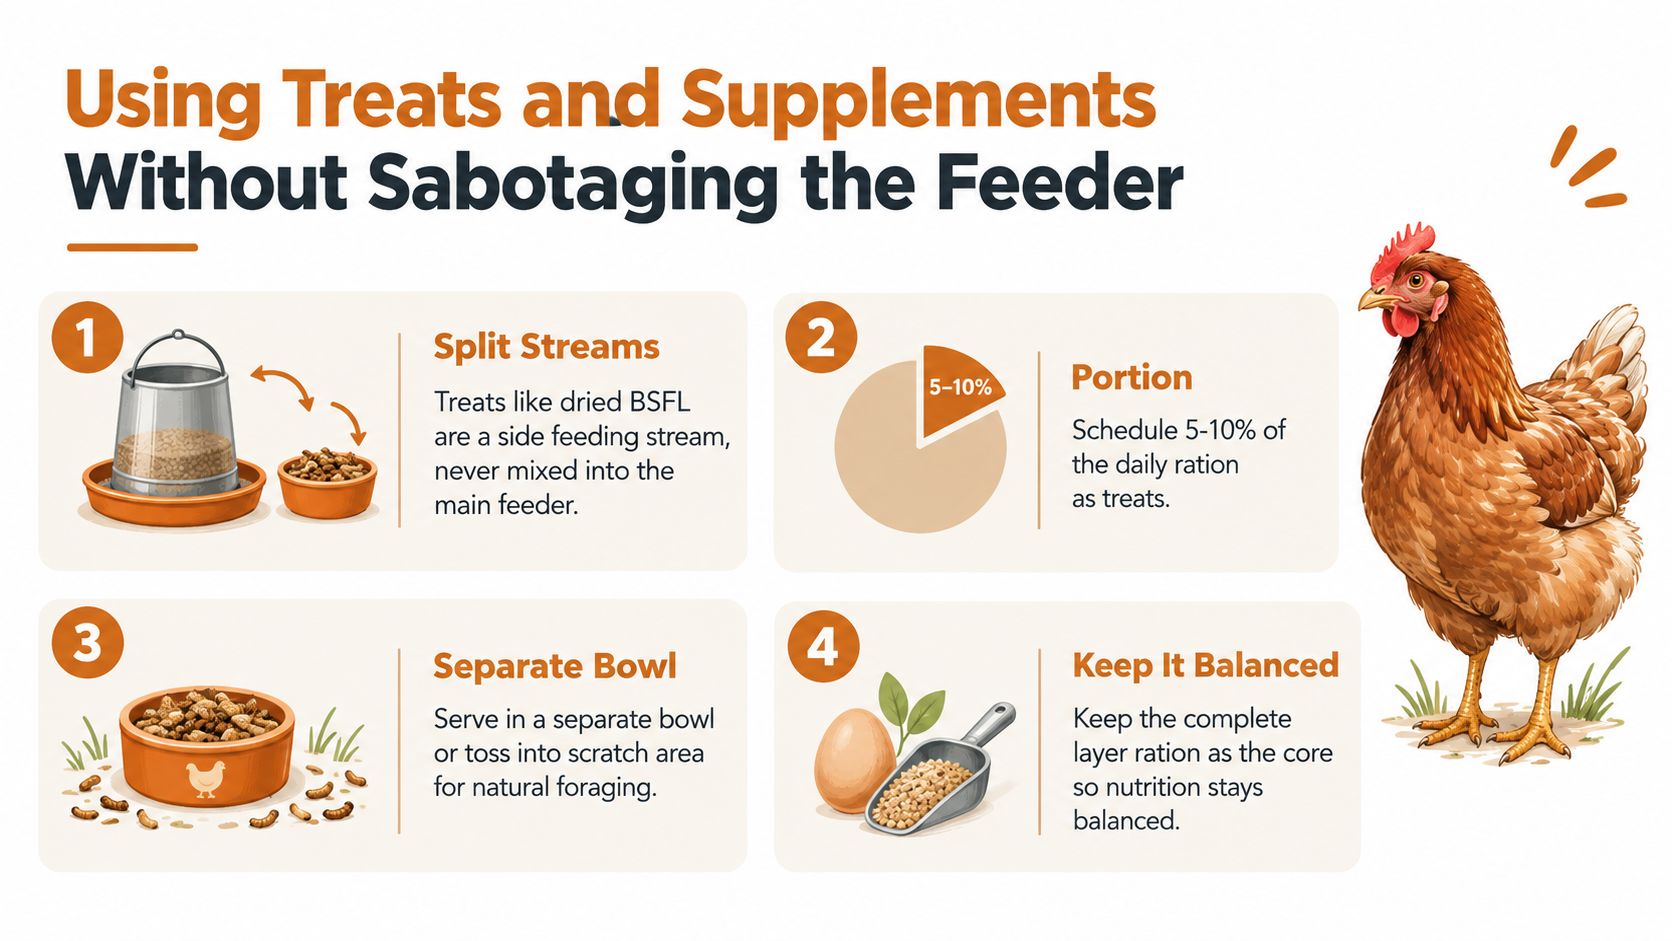
Treats should run through a separate feeding stream. Don't mix dried insects, scratch, or supplements into the main ration hopper unless you want clogs, selective eating, and a feeder that no longer delivers a consistent complete feed.
Serve treats in a small dish, a hanging treat container, or scattered into clean litter during the middle of the day. Keep the main feeder available for the complete ration. Hens quickly learn to wait for preferred pieces when the treat supply replaces ordinary feed, and that habit is harder to reverse than it is to prevent.
The plan is simple:
- Keep the main hopper boring and reliable. Fill it with the flock's appropriate complete feed.
- Use a separate dish for extras. Remove wet or leftover treats before they spoil.
- Scatter selectively. A small amount in litter encourages foraging without covering the whole run in food.
- Offer minerals separately. Oyster shell and grit work better in dedicated free-choice containers than mixed into the ration, because birds can choose what they need.
- Protect chicks from adult supplements. Keep medicated or specially supplemented feeds away from birds that shouldn't consume them.
Dried black soldier fly larvae fit this side-stream approach well because chickens can eat them from a separate dish or during supervised scatter feeding. Pure Grubs Black Soldier Fly Larvae are described by the catalog as USA-grown, plant-fed, dried larvae with 36–42% crude protein and 30–40% healthy fats. The catalog also states that the product contains no additives or preservatives and is intended for chickens and other animals.
Use the product as a treat, not as a replacement for the flock's complete ration. The dedicated dish keeps larvae out of the hopper, prevents the main feeder from becoming a mixed-food storage bin, and lets you control how much the birds receive.
For practical treat ideas and serving approaches, use this guide to treats for chickens. The feeder decision still comes first. If the main ration is wet, wasted, or monopolized by one hen, treats won't correct the underlying management problem.
Maintenance Routine and Final Buying Checklist
A feeder should be easy to inspect because inspection prevents most failures. Look at it daily for wet feed, blocked ports, spilled ration, cracked parts, and signs that rodents are reaching it.
Wipe accessible surfaces regularly and give the feeder a deeper wash when residue builds up. Use a mild cleaning solution, rinse thoroughly, and dry every component before refilling. Moisture trapped under a lid or inside a seam is more dangerous than a little visible dust.
Use the condition of the feeder as your schedule
- Daily: Check for dampness, droppings, clogs, and unusual waste.
- Weekly: Empty caked feed and wipe the pan, ports, lid, and mounting points.
- Monthly: Disassemble the feeder, scrub seams and corners, rinse, and dry completely.
- Quarterly: Inspect chains, brackets, treadle mechanisms, fasteners, rust, cracks, and drainage.
Replace plastic when it becomes brittle or cracked. File sharp metal edges and discard any part that can cut a bird. If feed repeatedly cakes in one port, the problem may be moisture, poor alignment, or a feeder that doesn't match the ration.
Before buying, check:
- Capacity: Does the hopper match your flock without hiding stale feed?
- Access: Can the smallest bird reach it without being bullied?
- Adjustment: Can you raise the feeder as birds grow?
- Weather resistance: Is the ration protected from rain and condensation?
- Pest control: Does the lid, treadle, chain, or mounting deter rodents and wild birds?
- Cleaning: Can you remove the pan and reach every seam?
- Drainage: Can trapped water escape?
- Parts: Are replacement lids, ports, chains, or seals available?
One feeder rarely handles every task. A raised gravity feeder for the complete ration plus a separate dish for treats is usually more practical than forcing one complicated unit to do everything. Buy the simplest design that fixes your largest pain point, install it at the birds' height, and judge the result by cleaner feed and calmer access.
Pure Grubs offers USA-grown dried black soldier fly larvae for chickens and other birds, with the catalog describing a clean, plant-based, additive-free treat that works in a separate dish or scatter routine. Visit Pure Grubs to choose a treat that fits your flock's feeding setup without turning the main ration feeder into a source of waste.