
What Do Pet Turtles Need A Complete Beginner's Care Guide
So, you're thinking about bringing a turtle home? Welcome to a truly rewarding world! Answering the big question—what do pet turtles need?—boils down to one key idea: you have to recreate their natural world in miniature. This means setting up a habitat with a place to swim and a place to sunbathe, providing specialized lighting and heating, keeping their water sparkling clean, and offering a balanced diet full of all the right nutrients.
Your Essential Turtle Care Checklist
Getting a turtle is a serious commitment. With the right care, many common species can live for over 20 years, so you're in it for the long haul. Unlike a puppy or kitten, a turtle’s health is completely dependent on the environment you build for it. Nailing the setup from day one isn't just a good idea—it's absolutely critical for their survival.
Think of yourself as the architect of a tiny, perfect ecosystem. Every single piece of equipment has a job to do. The warmth of a basking lamp, the quality of their food, the cleanliness of the water—it all works together to keep your turtle healthy and happy. Investing in the right gear upfront will save you from a lot of heartache and potential vet bills down the road.
The Four Pillars of Turtle Care
It can feel a little overwhelming at first, but good turtle care really comes down to four fundamental areas. If you get these right, you’ll be well on your way to being a fantastic turtle owner.
- A Proper Habitat: We're talking more than just a tank with water. Your turtle needs plenty of room to swim and a completely dry dock where it can get out, warm up, and bask.
- Specialized Lighting and Heat: Turtles are cold-blooded, which means they can't make their own body heat. A UVB lamp is non-negotiable for them to process calcium, and a separate heat lamp is needed to create that perfect toasty basking spot.
- Pristine Water Quality: Turtles do everything in their water—eat, sleep, and go to the bathroom. A strong filter and a consistent cleaning routine are essential to stop harmful toxins like ammonia from building up.
- A Balanced Diet: A healthy diet is the foundation for a strong shell and an active turtle. The best approach is a mix of quality commercial pellets, leafy greens, and the right kinds of protein. For example, you can supercharge their calcium intake with high-value treats; you can learn more about the benefits of using dried Black Soldier Fly Larvae as a fantastic supplement.
One of the biggest mistakes I see new owners make is thinking a turtle can live in a simple bowl of water. They require a specific, stable, and complete environment that you have to create and carefully maintain.
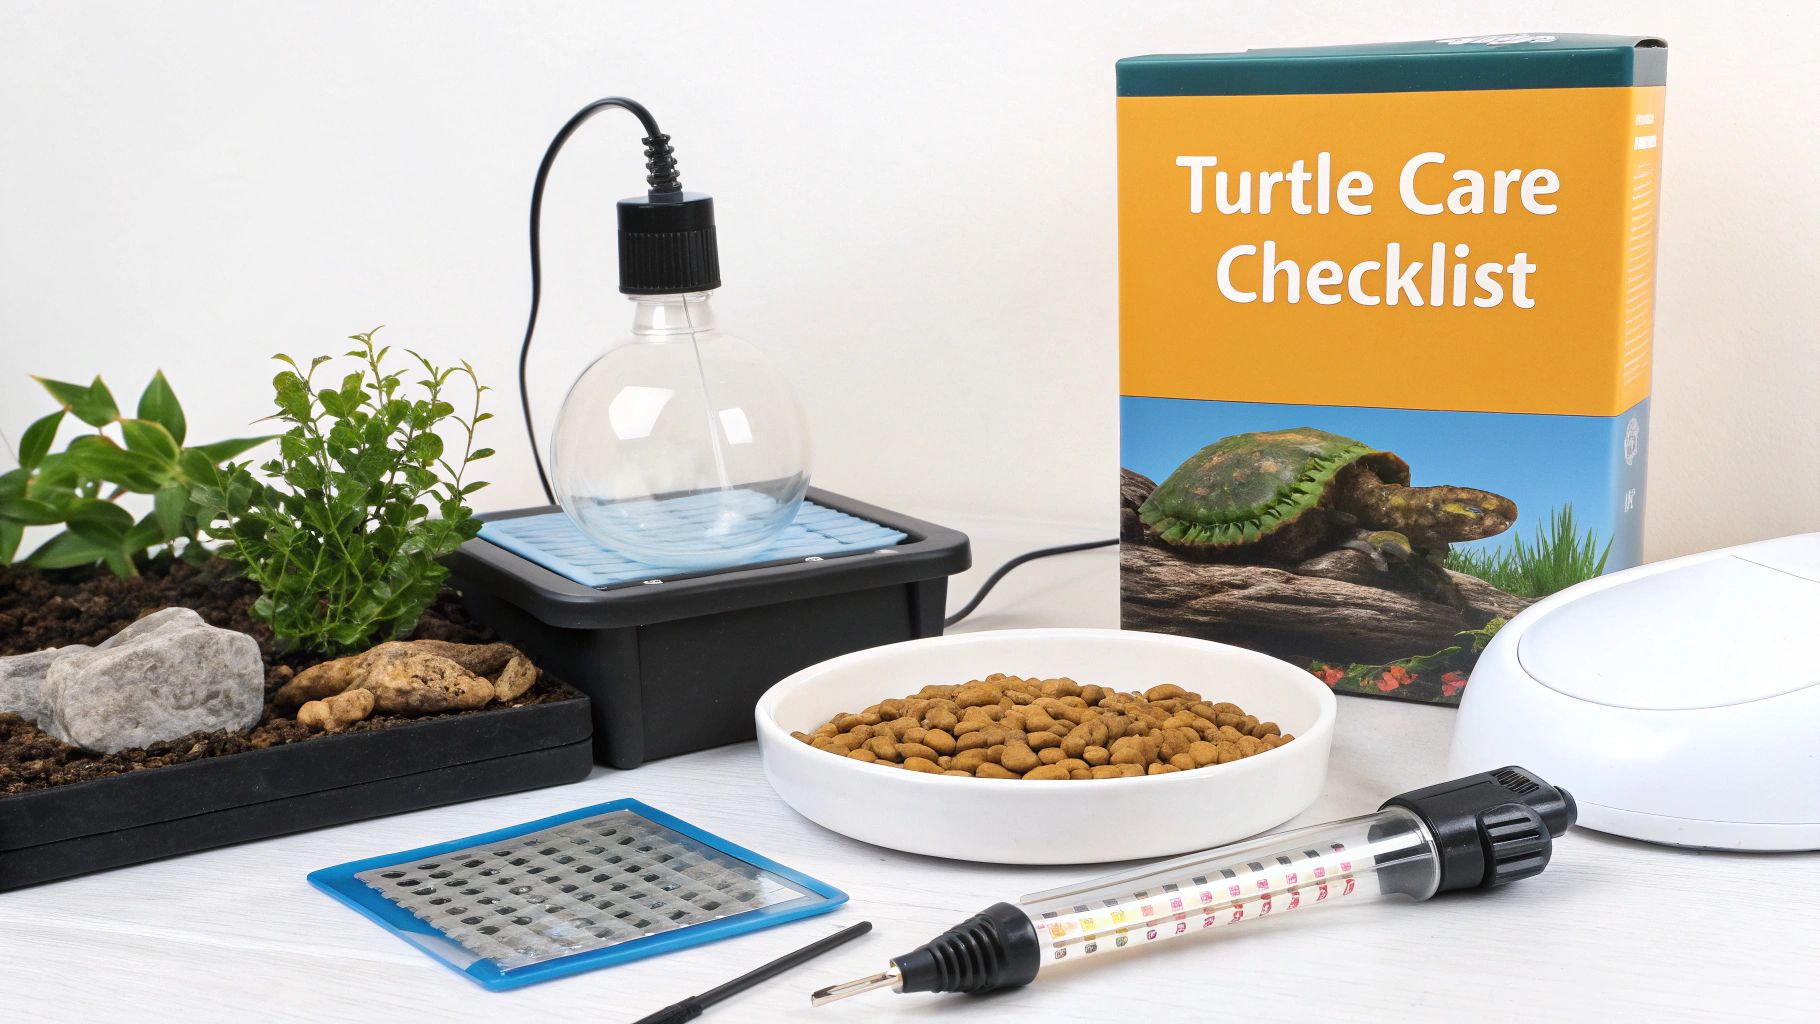
To make things easier, I've put together a checklist of all the essential gear you'll need. Make sure you have these items ready to go before you bring your new pet home.
Quick-Glance Turtle Setup Checklist
This table breaks down the non-negotiable items every turtle setup needs from the very beginning.
| Category | Essential Items | Why It's Critical |
|---|---|---|
| Habitat | Aquarium/Tank, Basking Dock | Provides space for swimming and a dry area to rest and absorb heat. |
| Lighting | UVB Light Fixture & Bulb | Essential for calcium absorption, preventing metabolic bone disease. |
| Heating | Heat Lamp Fixture & Bulb, Water Heater | Creates a warm basking spot and maintains stable water temperature. |
| Water | Powerful Water Filter, Water Conditioner | Keeps water clean from waste and removes harmful chemicals like chlorine. |
| Diet | Commercial Pellets, Calcium Supplement | Forms the core of a balanced diet and ensures proper shell growth. |
Having these five categories covered is the first, most important step in providing a healthy and thriving home for your turtle.
Setting Up Your Turtle's World
Think of your turtle’s tank as more than just a glass box—it's their entire universe. For any water turtle, getting this setup right is the most critical thing you'll do for them. It’s the foundation for a long, healthy, and happy life.
Getting the size right from day one is a game-changer. A cramped tank is a recipe for disaster, leading to stress, constantly dirty water, and even stunting their growth. The key is to plan for the full-grown adult, not the tiny hatchling you bring home.
Choosing the Right Size Tank
The rule of thumb I’ve always followed is the 10 gallons per inch of shell rule. It's simple: for every inch of your turtle's expected adult size, you need to provide at least 10 gallons of water.
Let's take a Red-Eared Slider, a super common pet. They can easily reach 10-12 inches as adults. Doing the math, that means you're looking at a 100-120 gallon tank. Many new owners buy a small starter kit, planning to upgrade later. Trust me, "later" often comes too late, and the turtle spends crucial developmental years in a space that's far too small.
It's always, always better to buy a bigger tank than you think you need. It gives your turtle room to thrive and makes your job of keeping the water clean infinitely easier.
Think of it this way: putting an adult slider in a 20-gallon tank is like making a goldfish live in a tiny bowl. It's just not enough space for them to live a healthy life. Investing in space is investing in their future.
The Two Must-Have Zones in Every Tank
Every aquatic turtle setup needs two distinct areas to mimic what they'd have in the wild. They need a place to swim and a place to get completely dry and soak up some sun (or the equivalent from your lamps).
-
Spacious Swimming Area: This is where they'll hang out most of the time. The water needs to be deep enough for them to swim and dive without feeling squished. A good benchmark is a depth of at least one and a half to two times your turtle's shell length.
-
A Completely Dry Basking Dock: This is non-negotiable. Turtles have to climb completely out of the water to dry their shell and skin, which helps prevent infections. This platform needs to be stable, 100% dry, and big enough for them to turn around on comfortably.
Filtration: Your Turtle's Life Support System
Let's be blunt: turtles are messy. They eat, poop, and sleep in their water, and their waste quickly turns into toxic ammonia. A powerful filter isn't a luxury; it's an absolute necessity.
Here's the secret: you need a filter rated for a tank that's two to three times the size of your actual aquarium. So, for a 75-gallon turtle tank, you should be shopping for filters made for 150-gallon or even 200-gallon fish tanks. That extra muscle is what you need to handle the massive bio-load turtles produce.
- Canister Filters: These are the gold standard for a reason. They sit outside the tank, so they don't take up valuable swimming real estate, and they hold a ton of filter media for superior cleaning power.
- Hang-on-Back (HOB) Filters: These can work for smaller tanks, but you still need to get an oversized model. They're easy to access for cleaning, which is a plus.
- Internal Filters: I generally don't recommend these as a primary filter for a turtle. They just don't have the power. They can be useful, however, as a secondary filter to help with water circulation.
Substrate and Decorations
The final touches—what goes on the bottom and what they can interact with—can make the habitat feel more natural, but safety has to come first.
For the bottom of the tank, you have two safe choices: large, smooth river rocks that are way too big for your turtle to eat, or a bare bottom. Honestly, a bare-bottom tank is the easiest to keep clean. Never, ever use small aquarium gravel or pebbles. Turtles will inevitably try to eat them, which can cause a fatal intestinal blockage.
Decorations like driftwood, secure ramps, or even sturdy fake plants can give your turtle places to hide and explore. Just make sure anything you put in the tank is non-toxic, stable, and designed in a way that your turtle can't get trapped or stuck underwater. Your goal is to build a safe and interesting little world for them.
Mastering Your Turtle's Lighting and Heating
A turtle's home is more than just a tank of water with a rock. It's a complete ecosystem where you have to play the part of the sun. Because turtles are cold-blooded, they're entirely dependent on their environment to warm up, cool down, digest food, and stay healthy. Getting the lighting and heat right is probably the single most important part of good turtle care.
Think about it like this: real sunlight provides two things—warmth you can feel and invisible ultraviolet (UV) rays. Your job is to mimic both of these inside the tank. If you miss one of these key ingredients, your turtle can get seriously sick, no matter how perfect its diet or how clean its water is.
The Life-Saving Power of UVB Light
Let's get straight to the point: the most critical piece of gear you will buy for your turtle is a full-spectrum UVB light. This isn't a "nice-to-have" accessory; it's non-negotiable. UVB light is what allows your turtle to produce its own Vitamin D3, which is absolutely essential for absorbing calcium from food.
Without proper UVB, a turtle simply can't process the calcium it eats. This leads to a devastating and preventable illness called Metabolic Bone Disease (MBD). MBD causes a turtle's shell to soften and deform, its bones to become fragile, and can ultimately be fatal.
To get the lighting right, you need to follow a few simple rules:
- Get the Right Bulb: Don't just grab any light. You need a bulb that specifically states it has a 5% to 10% UVB output. These are usually marketed for reptiles.
- Aim It Correctly: The UVB light needs to be positioned directly over the basking dock—that dry spot where your turtle climbs out of the water to sunbathe.
- Get the Distance Right: Most UVB bulbs are only effective from about 10-12 inches away. Place the lamp at that distance from the basking spot and make sure there’s no glass or plastic lid in between. Those materials block the beneficial UVB rays.
This concept map really breaks down how the basking area fits into the overall habitat.
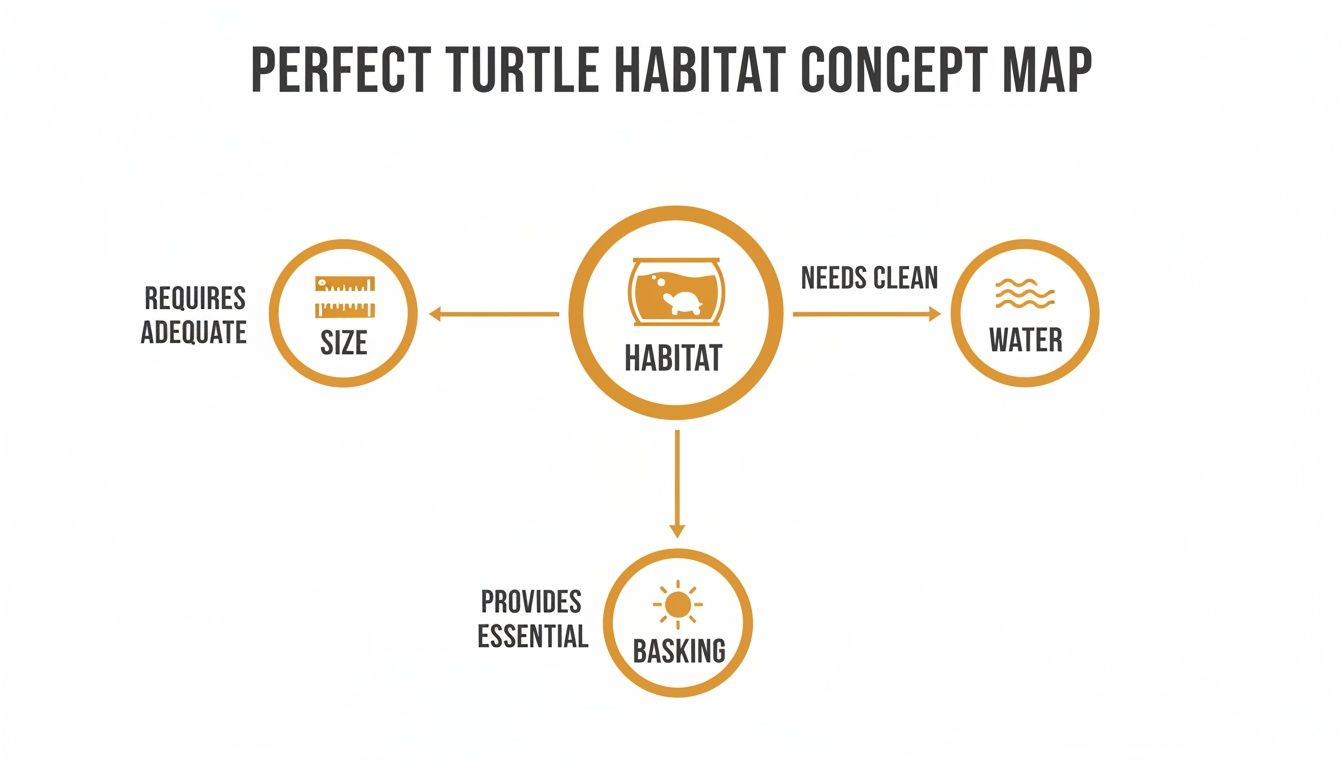
As you can see, the basking zone is a core component that works together with the tank size and water quality to keep your turtle thriving.
CRITICAL REMINDER: UVB bulbs wear out. They lose their ability to produce UVB rays long before the visible light burns out. You absolutely must replace your UVB bulb every 6 to 12 months. When you install a new one, take a marker and write the date on the bulb's base so you don't forget.
Creating the Perfect Hot Spot and Cool Zone
Besides UVB, your turtle needs a separate heat lamp to create a toasty basking spot. This is usually just a regular heat lamp with an incandescent or halogen bulb, placed right over the same basking dock. The whole point is to create a temperature gradient, giving your turtle a range of temperatures so it can decide for itself if it needs to warm up or cool down.
Your setup should have two distinct temperature zones:
- The Basking Area: This should be the warmest spot in the entire enclosure. For most common pet turtles like Red-Eared Sliders, you'll want the air temperature on the dock to be between 85-95°F (29-35°C).
- The Water Temperature: The water should be comfortably warm, but definitely cooler than the basking spot. A submersible aquarium heater is the best tool for the job. Keep the water consistently between 75-80°F (24-27°C).
This gradient is what allows a turtle to behave naturally. It will crawl onto the dock to bask, warming its body to help digest a meal and energize its immune system. When it gets warm enough, it’ll slide back into the cooler water. Always use two reliable thermometers—one for the air on the dock and one for the water—to keep a close eye on these temperatures every day.
Fueling Your Turtle with the Right Diet
Getting your turtle’s diet right is the single most important thing you can do for its health. Food is more than just a meal; it’s the fuel that powers their growth, keeps their shell hard, and supports their immune system for years to come.
A common mistake new owners make is thinking all "turtle food" is the same. The reality is, the perfect diet comes down to one thing: the specific species you own. Understanding what your turtle would eat in the wild is the first step to giving them a long, happy life in your home.
Omnivore, Carnivore, or Herbivore?
So, what does your turtle eat? Are they a meat-lover, a plant-eater, or a bit of both? Nailing this down is fundamental.
Most of the popular pet turtles you'll find, like Red-Eared Sliders and Painted Turtles, are omnivores, especially when they're young. This means their diet needs a healthy mix of animal protein and plant matter. As they get older, you'll often see them lean more heavily into their greens.
Some species are more specialized. Map Turtles and Musk Turtles, for instance, are primarily carnivores. In the wild, they’d be hunting for insects, crustaceans, and small fish. At the other end of the spectrum, you have strict herbivores like many tortoises, which are built to live on leafy greens and grasses.
For a typical omnivorous turtle, a well-rounded weekly menu looks something like this:
- High-Quality Commercial Pellets: These are the foundation, making up about 25-50% of what they eat. Always choose a formula made specifically for aquatic turtles.
- Leafy Greens and Veggies: Offer fresh, dark leafy greens like romaine, kale, or dandelion greens. A little shredded carrot or squash is a great addition, too.
- Protein Sources: This is where you can add some variety! Live or dried insects, shrimp, or even tiny pieces of cooked fish work well.
The Critical Role of Calcium and Protein
If there's one mineral you need to get right, it's calcium. It is literally the building block for your turtle's shell and bones. Without enough calcium—and the UVB light they need to absorb it—turtles can develop Metabolic Bone Disease (MBD), a devastating condition that causes their shell to soften, deform, and even collapse.
Protein is just as crucial, especially for growing hatchlings. For a healthy turtle, protein from sources like pellets and insects should make up 25-60% of their diet. A fantastic protein source like Black soldier fly larvae (BSFL) packs up to 42% protein and boasts a naturally ideal calcium-to-phosphorus ratio (1.5:1, compared to crickets at a dismal 1:7). This helps prevent MBD, which sadly affects an estimated 40% of pet turtles with poor diets.
That’s why just tossing in pellets every day simply isn’t enough. You have to actively supplement their diet with calcium-rich foods.
When you're picking supplements, the goal is to find foods that are naturally high in calcium but low in phosphorus. A bad calcium-to-phosphorus ratio can actually block the body from absorbing calcium, no matter how much is in the food.
Choosing the Best Protein Supplements
This is where a lot of well-meaning owners go wrong. They reach for treats like mealworms. Turtles absolutely love them, but mealworms are notoriously low in calcium and high in phosphorus—the exact opposite of what you want. Over time, this imbalance can lead to serious health issues.
A much, much better choice is Black Soldier Fly Larvae (BSFL). For reptiles, these little grubs are a nutritional powerhouse.
Why BSFL Are a Superior Choice:
- Naturally Packed with Calcium: Unlike pretty much every other feeder insect, BSFL have a naturally perfect calcium-to-phosphorus ratio. You don't even need to dust them with calcium powder.
- Excellent Protein Source: They deliver the high-quality animal protein your turtle needs for energy and strong muscle development.
- Encourages Natural Behavior: Tossing some dried BSFL into the water triggers your turtle's natural hunting and foraging instincts, which is great for mental stimulation.
Adding a calcium-rich treat like Pure Grubs' USA-grown BSFL, which deliver 85% more calcium than mealworms, is an easy way to boost your turtle’s diet. Just offer them two or three times a week. This isn’t just a snack; it's a vital part of a complete nutritional plan that ensures they get everything they need for a rock-solid shell. To learn more about how BSFL benefit other pets, check out our guide on Black Soldier Fly Larvae for bearded dragons.
Keeping a Clean and Healthy Tank Environment
For an aquatic turtle, their tank is everything—it's the air they breathe, where they eat, and their bathroom, all rolled into one. Let’s be real: turtles are messy. Their waste produces toxic ammonia that can quickly spike to dangerous levels, leading to nasty skin irritation, shell infections, and worse.
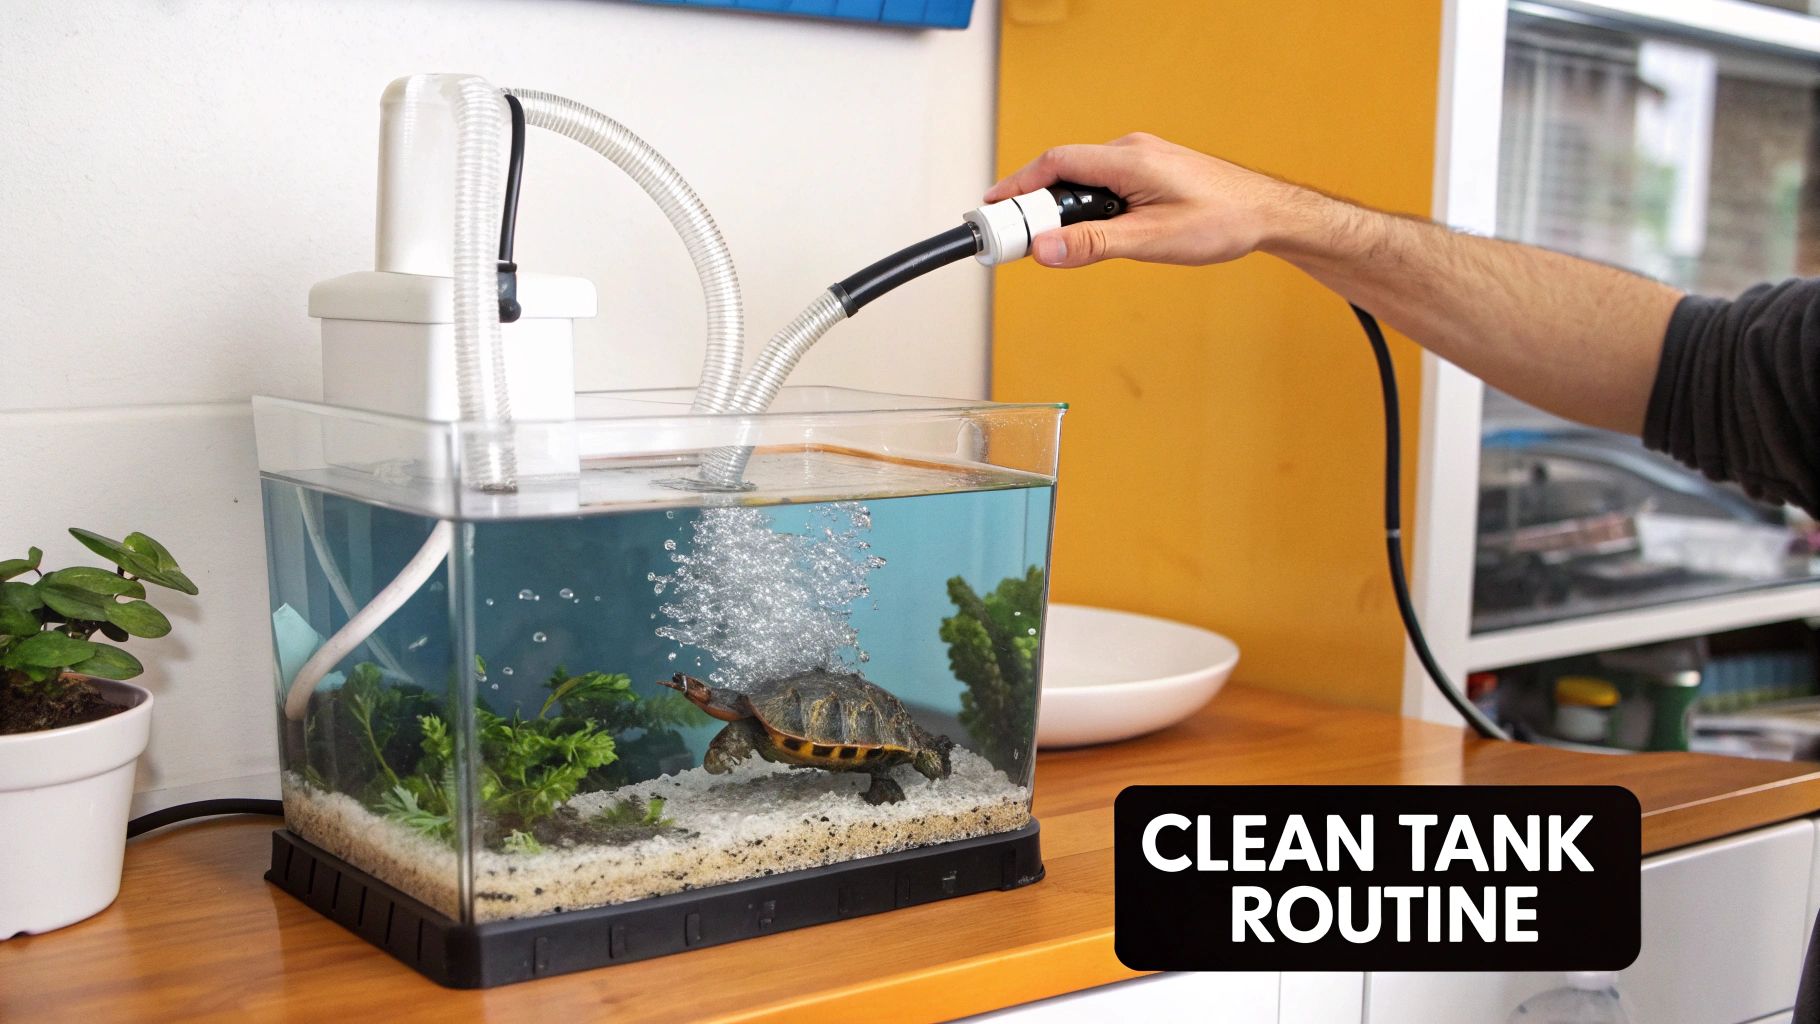
A powerful filter is absolutely your first line of defense, but it can't do all the heavy lifting on its own. A consistent cleaning schedule is your single most important tool for maintaining a healthy habitat. This isn’t just about aesthetics; it's a non-negotiable part of keeping your turtle alive and well. A clean tank means a healthy turtle.
The Importance of Water Changes
Think of a water change like opening the windows in a stuffy room. It flushes out all the accumulated gunk and brings in fresh, clean water. Sticking to small, regular water changes is far less stressful for your turtle (and you!) than doing a massive, infrequent deep clean.
Never, ever do a 100% water change unless a vet specifically tells you to for a medical reason. This will completely crash your tank's beneficial bacteria colony—the tiny workhorses that break down waste. A stable environment is a safe one.
Consistency is the name of the game. By setting up a simple weekly and monthly routine, you'll stay way ahead of the mess and keep your water pristine without it feeling like a huge chore.
Your Weekly Cleaning Routine
This quick, 20-minute weekly task is the backbone of a healthy tank. It keeps ammonia and nitrates in check and stops waste from building up in the substrate.
-
Perform a Partial Water Change: Grab a siphon or gravel vacuum and remove about 25-30% of the tank’s water. As you're siphoning, hover the vacuum over the substrate to suck up any uneaten food and turtle poop.
-
Scrub the Surfaces: Use an algae scraper or a dedicated sponge to wipe down the tank walls, basking dock, and any large decorations.
-
Refill with Treated Water: Before adding fresh tap water back into the tank, you must treat it with a water conditioner. This is a critical step that neutralizes chlorine and chloramines, which are toxic to your turtle.
Monthly Maintenance Deep Dive
Once a month, it's time to roll up your sleeves and go a little deeper. This includes all the weekly steps, plus a couple of other important checks.
-
Filter Maintenance: Your filter is a bustling metropolis for beneficial bacteria. To clean it without evicting them, gently rinse the filter media (like sponges or ceramic rings) in the old tank water you just siphoned out. Never rinse filter media under chlorinated tap water—it's a surefire way to kill off all that good bacteria.
-
Deep Substrate Clean: Give the substrate a more thorough vacuuming than you do weekly. Really get into the corners and around decorations where waste loves to hide.
-
Inspect Your Equipment: Take a minute to check that your heater and filter are working properly. Is the heater holding the right temperature? Is the filter's water flow still strong and steady?
Following this simple schedule creates a stable, safe, and clean world for your pet. It's one of the most important things you can do to ensure your turtle has a long and happy life.
Recognizing Common Turtle Health Problems
Being a great turtle owner is a lot like being a detective. Your turtle can't tell you what's wrong, so you have to learn to read the clues. Catching subtle signs of trouble early is the absolute best way to prevent a small issue from becoming a serious emergency.
Think of your turtle's normal, everyday behavior as your baseline. A healthy turtle is usually active, alert, with bright, clear eyes and a solid shell. The very first red flag is often a change in that routine—maybe they're suddenly sluggish, have lost their appetite, or are constantly hiding. When you see this, it's time to put on your detective hat.
Performing a Quick Health Check
You don't need a veterinary degree to give your turtle a quick wellness check. Just take a few minutes once a week to gently look them over from head to tail. This simple habit helps you get intimately familiar with what's normal for your specific turtle, making it much easier to spot when something is off.
Here’s a simple checklist to run through:
- Eyes: They should be wide open and clear, with no puffiness or gunk. Swollen, sealed-shut eyes are a classic sign of a Vitamin A deficiency or a brewing respiratory infection.
- Nose and Mouth: Look for any bubbles, foam, or discharge around the nostrils. If you see your turtle breathing with its mouth open or hear wheezing, that points to a serious respiratory problem.
- Shell: A healthy shell feels rock-solid all over. If you find any soft spots, weird flaking, or discolored patches, you could be looking at Metabolic Bone Disease (MBD) or shell rot.
Common Ailments and Their Causes
The good news is that many common turtle illnesses are directly tied to their environment or diet. This means they are almost always preventable with the right care.
Metabolic Bone Disease (MBD)
This is a devastating but preventable condition caused by a lack of two critical things: calcium and proper UVB light. Without them, a turtle's shell can become soft and rubbery, and its bones can even become deformed. The only way to stop it is with a top-notch UVB setup and a diet packed with calcium. Using the right supplements is a huge help; you can learn more about the benefits of high-calcium treats like black soldier fly larvae for reptiles.
Respiratory Infections
These nasty infections are often triggered by a habitat that's too cold, poor water quality, or a lack of Vitamin A. The classic signs are wheezing, lethargy, and tell-tale bubbles coming from the nose. A turtle that swims lopsided is also a major warning sign.
When to Call the Vet: If you spot signs of a respiratory infection, shell rot, or MBD, don't wait. It’s time to call a qualified reptile veterinarian immediately. These conditions can go downhill fast and need professional medical care.
Knowing what a healthy, happy turtle looks and acts like is your greatest tool. It allows you to be proactive and is truly the cornerstone of responsible turtle ownership.
Your Top Turtle Care Questions, Answered
Getting started with a pet turtle often sparks a lot of questions. Let's tackle some of the most common ones that pop up for new owners, so you can feel confident you're giving your little shelled friend the best care possible.
One of the first things people ask is if they can let their turtle roam around the house for exercise. While it might seem like a fun idea, it's actually quite dangerous. Floors are often cold and drafty, putting your turtle at high risk for a respiratory infection. Plus, they absolutely need the specific temperatures and UVB light provided in their habitat to stay healthy, which they can't get wandering around your living room.
Common Questions from New Turtle Keepers
Figuring out if your turtle is a boy or a girl is another common puzzle. It's tough when they're young, but as they mature, you can often spot some clear giveaways, especially in popular species like Red-Eared Sliders.
- Telling the Boys: Males are usually the smaller of the two. Look for really long front claws—they use these in their courtship rituals. Their tails are also typically longer and thicker.
- Identifying the Girls: Females grow larger than males. Their front claws are much shorter and stubbier, and they have a short, neat tail. A male's bottom shell (the plastron) is also often slightly concave, or curved inward.
A question that comes up all the time is, "Will my turtle get lonely?" The short answer is no. Turtles are naturally solitary creatures and are perfectly content living alone.
In fact, housing multiple turtles together often causes more harm than good. It can lead to bullying, stress, and competition over food and the best basking spots, which can result in serious injuries. Unless you're an experienced keeper with a massive enclosure, it's far safer and kinder to let your turtle have its own space. Understanding this is key to providing a happy, stress-free life for your pet.
For a natural, high-calcium treat that supports strong shell growth, consider Pure Grubs. Our USA-grown Black Soldier Fly Larvae are a safe and nutritious supplement perfect for your turtle. Find out more about Pure Grubs.