

How to Build a Makeshift Chicken Coop
A chick delivery arrives earlier than expected, a rescued hen needs somewhere dry tonight, or a coop move leaves the flock temporarily homeless. A shed, a few pallets, or a repurposed playhouse can look like a quick answer. But a shelter that blocks rain can still trap damp air, invite predators, or make cleaning a daily struggle.
A makeshift chicken coop can work when you judge it by more than its materials. The true test is whether it gives birds enough space, fresh air, secure shelter, and a cleanable place to live.
Why a Makeshift Coop Can Work
The improvised coop isn't a fringe solution. In the USDA's 2024 national backyard-animal study, 6.7% of U.S. adults reported keeping poultry at home, and chicken ownership was measurable in cities such as Denver and Miami. Those figures show that backyard poultry keeping includes urban households as well as rural properties, making practical guidance for sheds, pallets, and other repurposed structures useful to a wide range of keepers. The USDA's backyard-animal study
That doesn't mean any structure becomes safe just because it has a roof. A tarp stretched over a frame may keep off rain but leave the flock exposed to wind and predators. A sealed garden shed may feel sturdy yet hold onto moisture and odors. A repurposed playhouse might have useful walls and a door, but still need better ventilation, a secure floor, and protected openings.
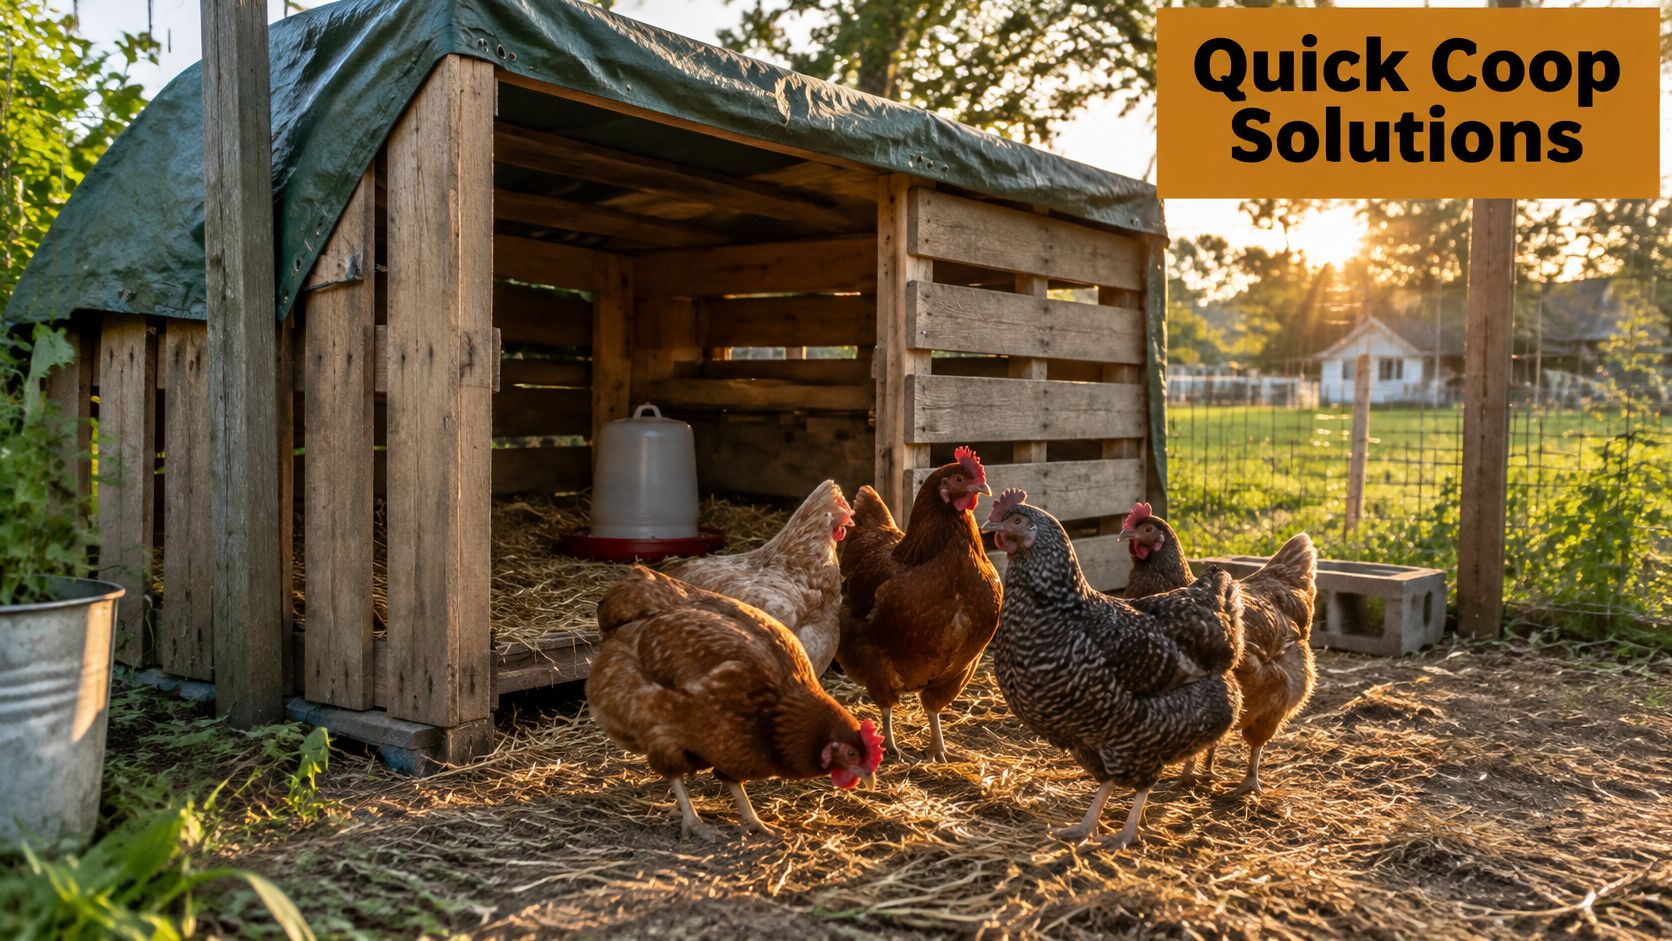
Think of the structure as a starting point, not a finished coop. Walk around it as if you were rain, a digging predator, a rodent, or a person trying to clean out soiled litter. If water runs toward the floor, gaps let wildlife inside, or you can't reach the corners to scrub them, those aren't cosmetic issues. They're design problems that need solving before birds move in.
Practical rule: Temporary construction doesn't mean temporary standards. Build for the conditions your flock will actually face.
A few lighthearted details can make a functional coop feel more at home in the yard. If you want inspiration for adding personality after the safety basics are handled, Farmhouse World's funny chicken coop signs offers ideas for a bit of humor without turning the coop into a substitute for sound housing.
Choosing Materials and Sizing Your Coop
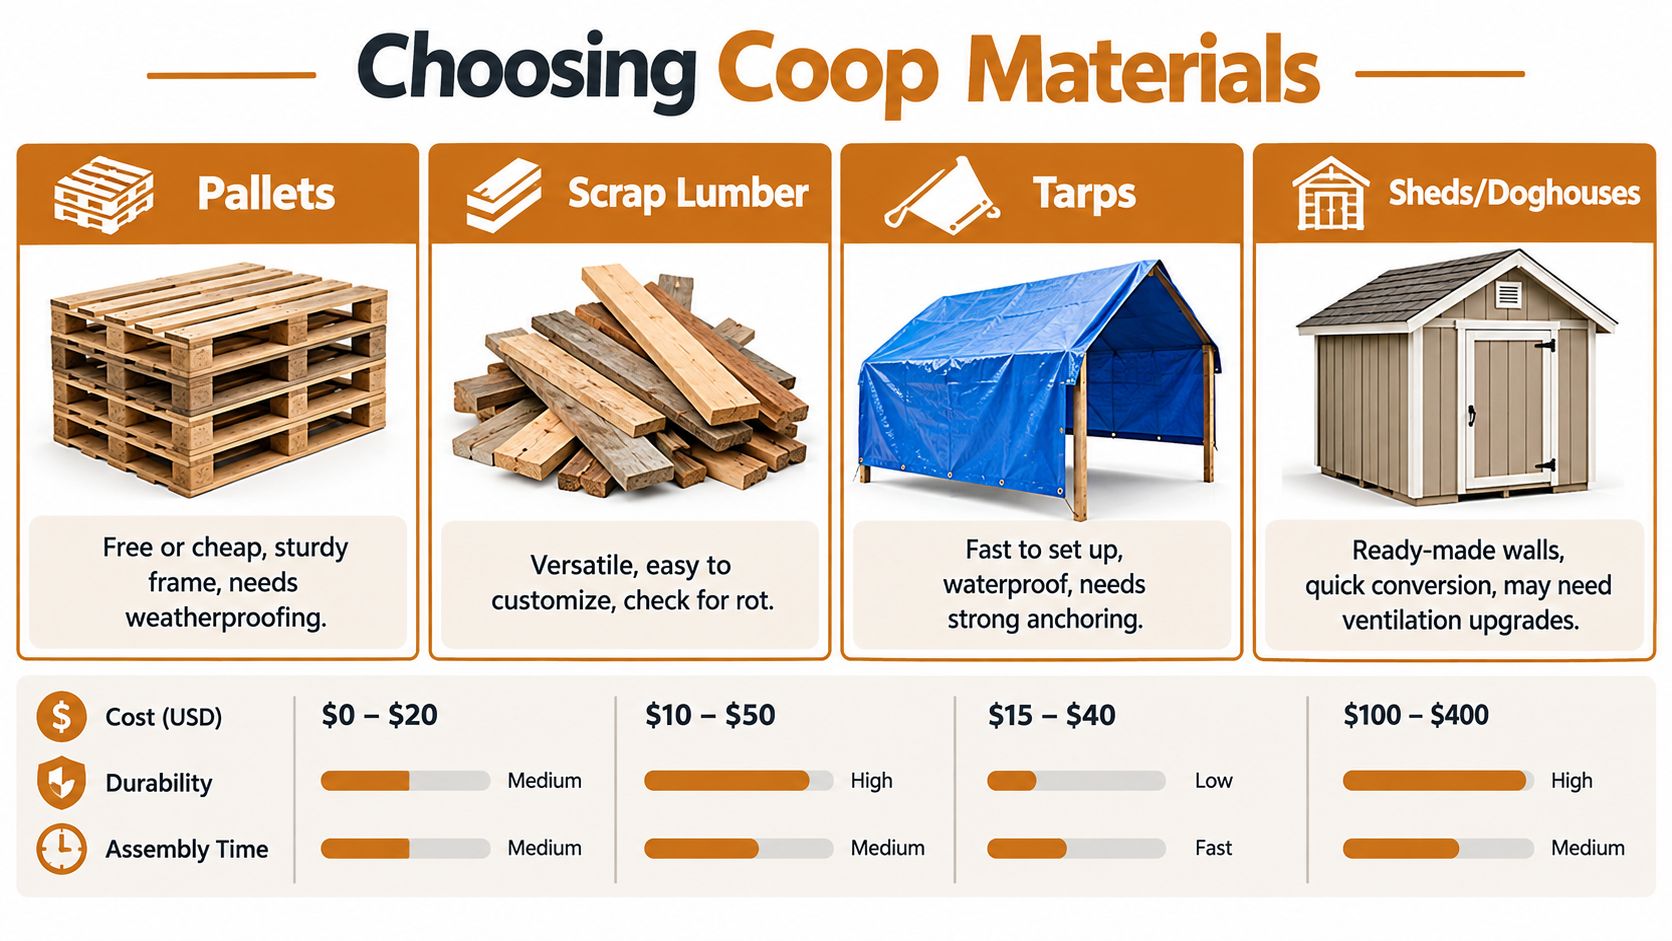
Start by checking what you already have. A pallet can make a useful frame, but its gaps need closing and the wood needs protection from weather. Scrap lumber is adaptable, provided it isn't rotten, splintered, or coated with a material you can't identify. A tarp is quick cover, not a complete wall system: it needs strong anchoring and a plan for airflow. A shed or doghouse gives you ready-made walls, but may need substantial ventilation and access upgrades.
Whatever the material, ask whether the surface can be kept dry and cleaned. A rough, damp floor and inaccessible corners turn a cheap structure into a frustrating one. Check the roof and frame for stability, too. Loose panels, exposed fasteners, and weak joints can fail under wind or when you're opening and cleaning the coop.
Do the floor-space math first
Measure the usable indoor floor area, then decide whether the birds will have outdoor access. Oregon State University Extension recommends at least 3 square feet of indoor space per bird when chickens have access to an outdoor run, and 8–10 square feet per bird when they don't. Oregon State University Extension's coop guidance
For six hens, that works out to a minimum of 18 square feet indoors with a run. If the coop itself is their primary living area, plan for 48–60 square feet. Do not count a nest box, storage shelf, or blocked-off corner as floor space the birds can use.
Sizing and ventilation go together. A cramped coop puts more moisture and waste into less air volume, so don't treat a too-small structure as something you can fix by adding a vent. For a practical rundown of the other basic coop features to plan for, use this guide to what chickens need in a chicken coop.
A quick visual guide can help compare materials, but take measurements before you start cutting or attaching anything. A structure that looks spacious from the yard may have less usable floor area than you expect once you account for fixtures and access.
Building the Frame and Floor
Choose a site that drains well and lets you reach the coop to clean it. Avoid a low spot where rain collects or a location that stays damp. Before adapting a shed or playhouse, open it up and inspect the floor, walls, roof, door, and joints. Repair weak areas first instead of covering them with another layer of material.
For a new frame, use sound lumber and brace the structure so it doesn't wobble. With a repurposed building, reinforce loose corners and make sure the door closes securely. The roof should shed water away from the walls and floor; an overhang can help keep rain from running straight into openings. Weatherproofing should keep the inside dry without sealing off the airflow the flock needs.
Make the floor cleanable
A coop floor takes daily wear from litter, spilled water, and droppings. Choose a surface you can scrape and wipe, and arrange the floor or surrounding grade so water doesn't sit against the building. Oregon State University Extension recommends raising housing about 1 foot to discourage rats, snakes, and skunks, and using secure flooring that can be cleaned. Oregon State University Extension's predator-control guidance
If raising the structure isn't practical, pay close attention to the base. Close gaps, keep the surrounding area clear, and make sure the floor remains dry and accessible. Don't leave porous scraps or untreated surfaces in places where they'll stay wet or hold waste. A floor that's difficult to clean is a recurring maintenance problem, even if the rest of the coop is sturdy.
Add roosts above the litter so birds aren't sleeping in their waste, but don't push them into the roof's least-ventilated zone. Secure them firmly and leave enough room to reach beneath them during cleaning. The same principle applies to nesting areas: provide a usable, sheltered spot without blocking access to the floor or creating a hard-to-clean pocket.
For a shed conversion, resist the urge to fill every opening with solid material just to make it look finished. Plan safe ventilation and protected access points before installing walls or panels. A simple structure is easier to maintain when its layout gives you a clear route to inspect the floor, refresh litter, and remove debris.
Ventilation and Predator Protection Done Right
A common makeshift-coop mistake is treating airflow and predator resistance as opposing goals. They aren't. Protect the openings birds need for fresh air, then make the protection itself secure. Oregon State University Extension identifies ventilation as essential for removing ammonia fumes, carbon dioxide, and moisture. Openings should allow air exchange without sending a draft directly across roosting birds.
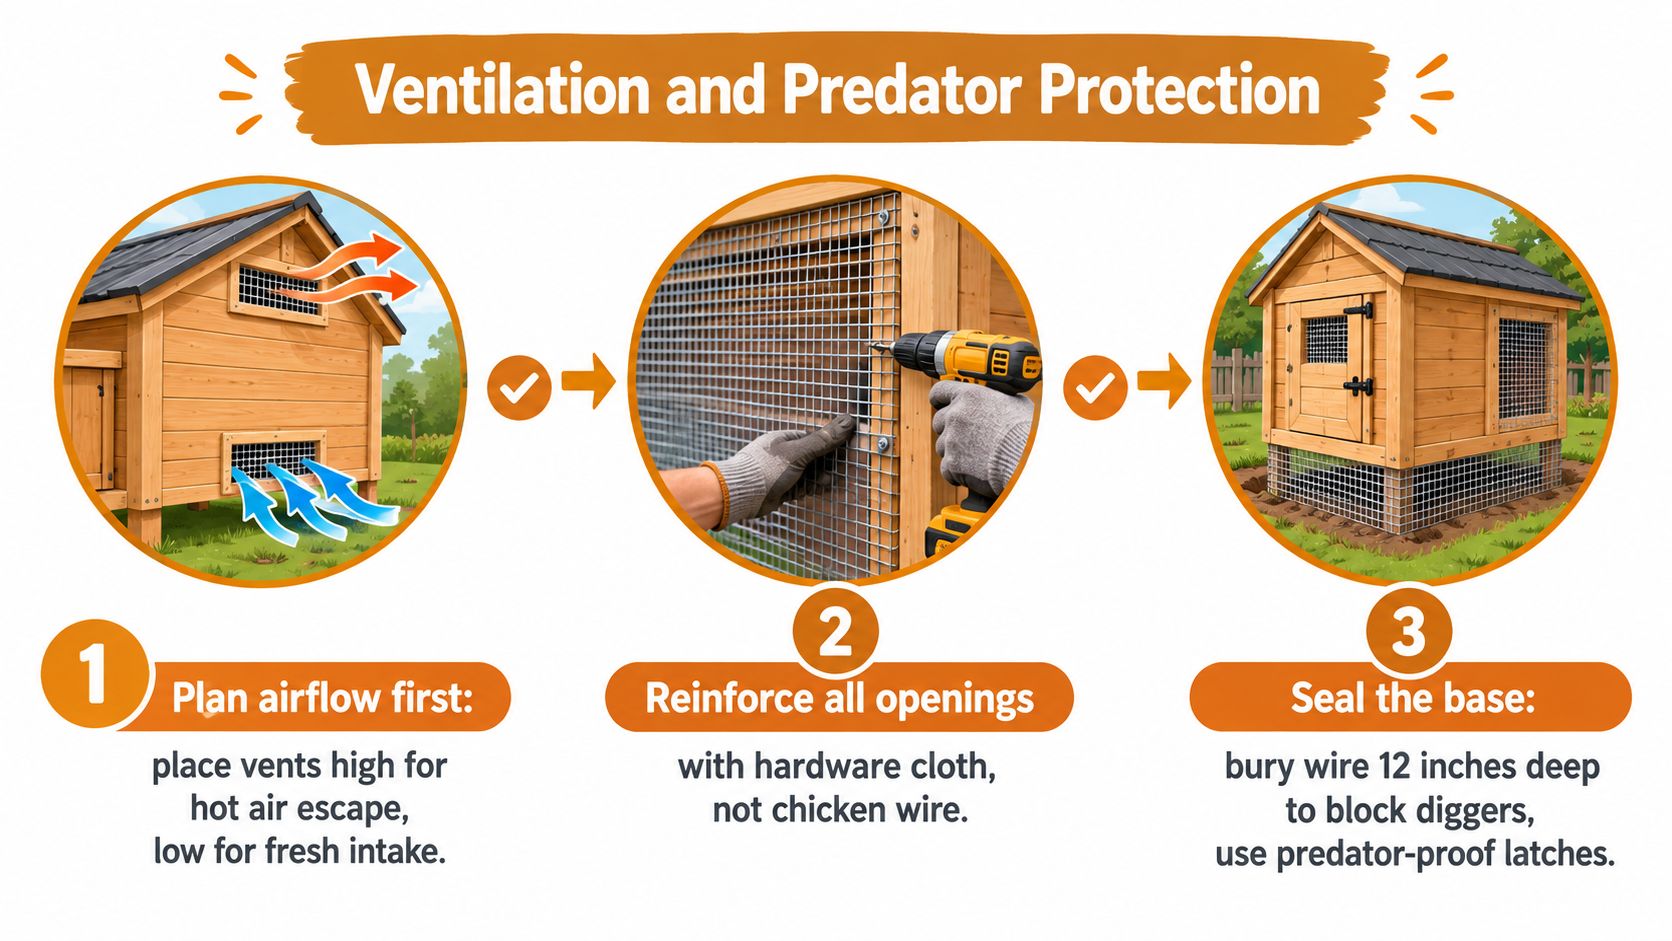
Passive ventilation can work well in backyard housing. Use high openings near the eaves, upper walls, or gables to let warm, moist air escape, with a path for fresh air to enter. Keep the sleeping area out of a direct draft. During hot or humid conditions, a fan may help, but don't point it directly at the flock.
Secure the openings, not just the door
Inspect the entire shell, including windows, vents, eaves, torn screens, and joints between boards. Cover ventilation openings with rigid hardware cloth, fastened with screws and large washers. Overlap seams so a predator can't pull an edge loose. Ordinary poultry netting isn't a substitute for a rigid barrier where an animal could force its way in.
Doors should fit tightly and close reliably. Where raccoons are common, a two-stage latch adds protection against a simple latch being lifted. At the run, bury or flare the lower edge of the barrier outward to discourage digging. Cover the run where overhead predators are a concern, and don't leave feed or debris that attracts pests. The USDA APHIS biosecurity workbook provides guidance on inspecting structures and securing openings.
Shade matters, but don't solve hot-weather exposure by wrapping the whole coop in material that traps heat. Shade the roof or part of the run while preserving high-level airflow. Keep vulnerable ground-level openings protected, and use upper vents to maintain air movement. In cold weather, block prevailing wind from the roosting area without closing the coop so tightly that moisture builds up.
The trade-off is straightforward: secure the base and openings, preserve controlled airflow above the birds, and provide shade without enclosing the structure in heat-trapping material. For additional practical steps to reduce rodent access around the coop, see this guide to keeping rats away from a chicken coop.
The Biosecurity Audit for Makeshift Housing
A coop can keep out rain and still make flock care harder than it needs to be. Rough surfaces that hold dirt, open feed, standing water, and gaps at the base can frustrate cleaning and attract unwanted visitors. The cheapest structure isn't necessarily the least costly choice if you can't keep it dry, clean, and secure.
The CDC recommends that backyard poultry housing be sturdy, weather- and predator-protective, and easy to clean. It also advises using feeders and waterers that are easy to clean and disinfect. CDC guidance on backyard poultry
Give the coop a safe-enough check
Use this audit before birds move in, and repeat it when the housing changes:
- Cleanable surfaces: Can you scrape the floor and wipe the areas around feeders and waterers? Replace or cover surfaces that remain dirty or damp.
- Drainage: Does water run away from the coop, or pool beneath it? Correct pooling and remove persistently wet litter.
- Protected feed: Keep feed covered and containers closed between uses. Spilled feed can attract rodents and other visitors.
- Rodent exclusion: Check for gaps beneath walls, at corners, and where the floor meets the frame. Close access points without blocking planned ventilation.
- Dedicated footwear and equipment: Keep coop shoes and cleaning tools separate from gear used elsewhere, and clean them regularly.
- Isolation space: Have a separate place available to keep a new or sick bird apart from the flock while you assess the situation.
Biosecurity isn't just about what the walls are made of. It's also about whether you can clean the enclosure and equipment, prevent unwanted contact, and keep feed and water from becoming contaminated. For practical routines that support a clean coop, use this guide to chicken coop hygiene.
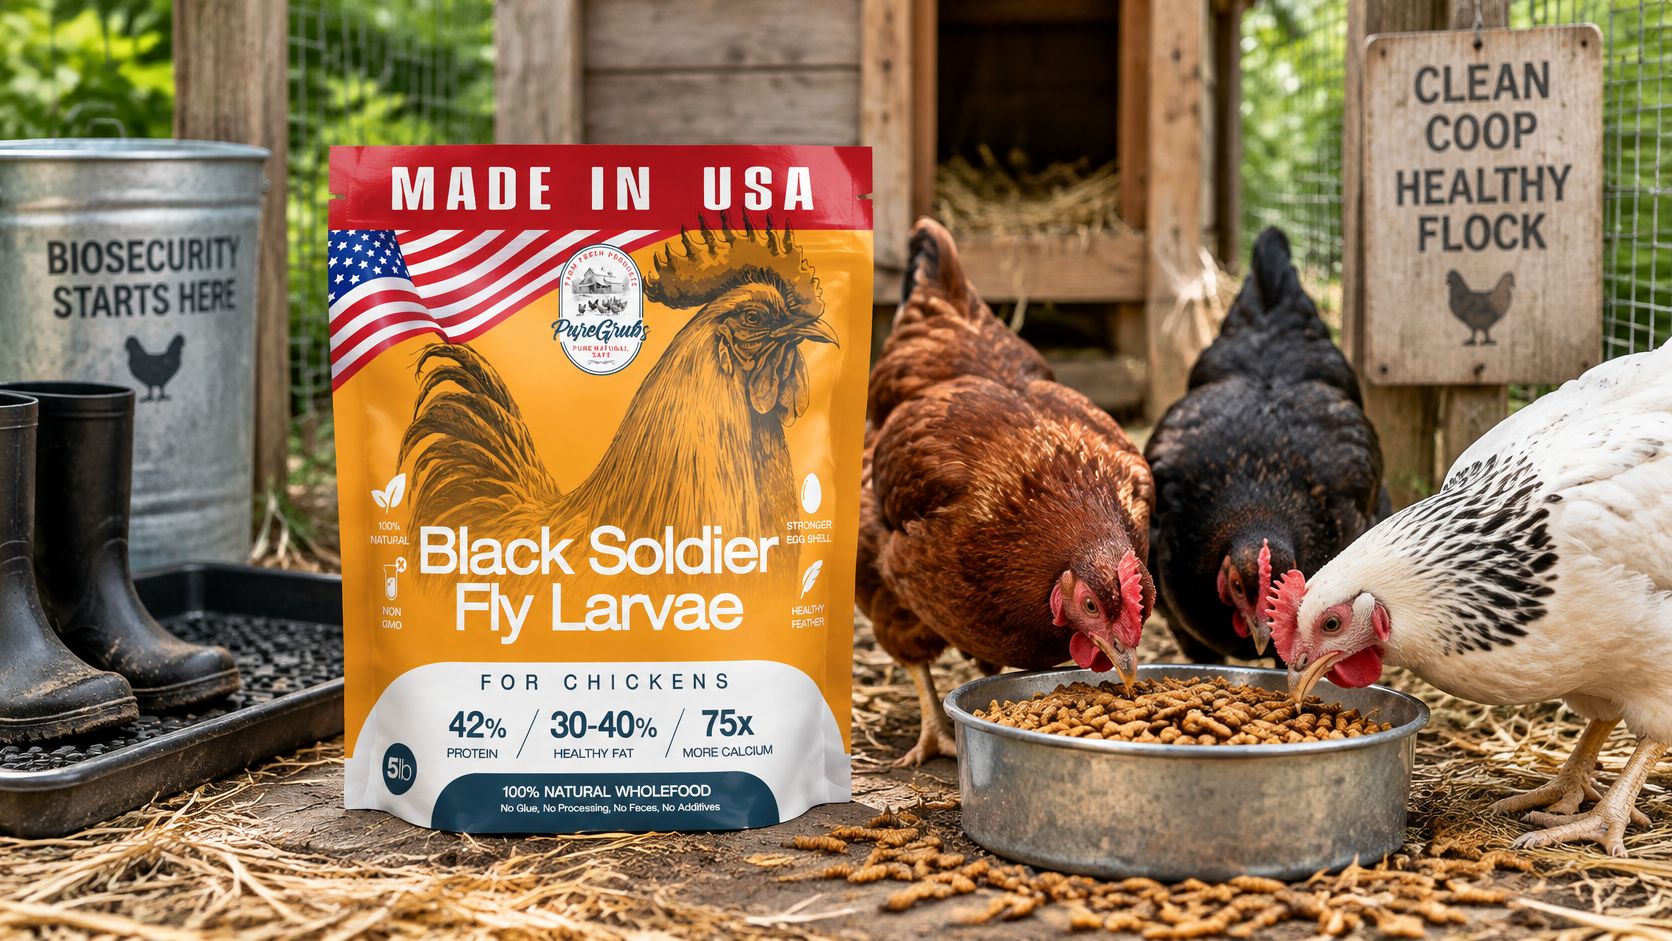
Feed belongs in that same care routine, but treats don't replace clean water, a sound diet, or good housing. If you give treats, USA GROWN BLACK SOLDIER FLY LARVAE FOR CHICKENS are an option described as containing 36–42% crude protein and 75 times more calcium than mealworms. Store any feed or treat securely so it doesn't undermine the rodent-exclusion work around the coop.
Quick Fixes for Common Problems
When a makeshift coop has a problem, fix the cause rather than covering the symptom. A sealed wall can stop a draft but trap damp air. A tarp may shed rain yet flap loose in wind. A patch over a gap may keep out a predator only if it's fastened firmly and doesn't block an important vent.
Start with a check after the birds have spent the night inside. Extension guidance recommends that litter remain dry, condensation be absent, and the coop not smell strongly of ammonia after one night. If moisture or odor has built up, increase high-level vent area and improve litter management instead of sealing the building tighter. Oregon State University Extension's coop-design discussion
Match each symptom to a repair
- Wet litter or condensation: Check for leaks and water spills, remove wet litter, and improve airflow through high openings.
- A draft across the roost: Redirect or shield the incoming air so it doesn't blow directly onto sleeping birds. Preserve ventilation elsewhere.
- A gap at the base or around a vent: Secure it with a fitted, durable barrier, and check that the fix hasn't closed off the airflow path you need.
- A loose or unstable roof: Refasten or reinforce it before bad weather exposes the weakness. A tarp that shifts in wind isn't a reliable roof.
- A strong odor: Remove waste and damp litter, check waterers for spills, and improve ventilation rather than masking the smell.
Don't judge the structure only in mild weather. Look at it at dusk, when birds are settling in and doors need to close securely, then check again during the hottest part of the day. Make sure shade doesn't block airflow, panels stay in place, and the run remains protected from above and below. If you find a weakness, correct it before it becomes the flock's routine exposure.
Final Checklist for a Safe Makeshift Coop
Before bringing birds inside, confirm that the structure is ready for daily use, not just standing in the yard.
- Space: Measure usable indoor floor area against the flock size and whether birds have access to a run.
- Airflow: Provide fresh-air exchange without directing a draft across the roost.
- Predator protection: Check the door, vents, windows, roof edges, joints, and run barrier. Fasten protective mesh securely.
- Dry, cleanable housing: Make sure the floor drains or stays dry and can be cleaned.
- Safe sleeping area: Keep the roost above litter, out of direct drafts, and away from poorly ventilated roof space.
- Biosecurity routine: Protect feed, clean feeders and waterers, keep coop tools distinct, and have a plan for separating a new or sick bird.
- Follow-up checks: Look for moisture, odors, loose materials, and new gaps after birds move in.
A makeshift coop isn't finished when the last board goes on. It's ready when you can keep it dry, ventilated, predator-resistant, and clean through ordinary daily care. Walk the perimeter, inspect the sleeping area, and correct any problem before you leave the flock in it.
Pure Grubs offers USA-grown dried black soldier fly larvae as a supplemental treat for chickens and other birds. If you're looking for a feed option to keep alongside your coop supplies, visit Pure Grubs.