

Building a Coop with Nesting Box the Right Way
You've finished the coop, the run is secure, and the nesting boxes look exactly like the plans promised. Then the pullets arrive, ignore the boxes, and start leaving eggs in the corners, under the feeder, or outside in the dampest patch of the run. That frustrating result usually isn't a hen problem. It's a design problem that only becomes visible once real birds move in.
A coop with nesting box has to work as a behavioral system, not just a tidy wooden structure. Light, height, drafts, roost placement, bedding, cleaning access, and flock competition all influence whether hens use the space you built. The practical test is simple: can the birds find it, feel secure in it, and leave clean eggs there without creating extra work for you?
Why Most Coop Builds Miss What Hens Actually Need
The first coop I helped repair looked good from the outside. The siding was straight, the run had a neat gate, and the nesting boxes were mounted in a row where they were easy for the owner to admire. The hens had a different opinion. The boxes were bright, exposed to the prevailing wind, and positioned higher than the roosts. The birds slept in them at night, so the bedding became dirty before morning, while eggs appeared beneath the waterer.
That pattern is common because builders often design from the human side of the fence. We think about symmetry, convenient hatch placement, and whether the finished coop photographs well. Hens care more about privacy, security, familiarity, and habit. A box that looks perfectly accessible to you may feel too open or unsafe to a bird deciding where to lay.
Practical rule: If hens can sleep in the boxes, see too much activity from them, or reach a quieter corner elsewhere, they may choose the corner.
A useful guide to what chickens need in a coop reinforces the wider point: the nesting area is only one part of a working environment. Feeders, drinkers, roosts, ventilation, and cleaning access all affect how birds use the building. A box can't compensate for a damp floor, poor airflow, or a crowded sleeping area.
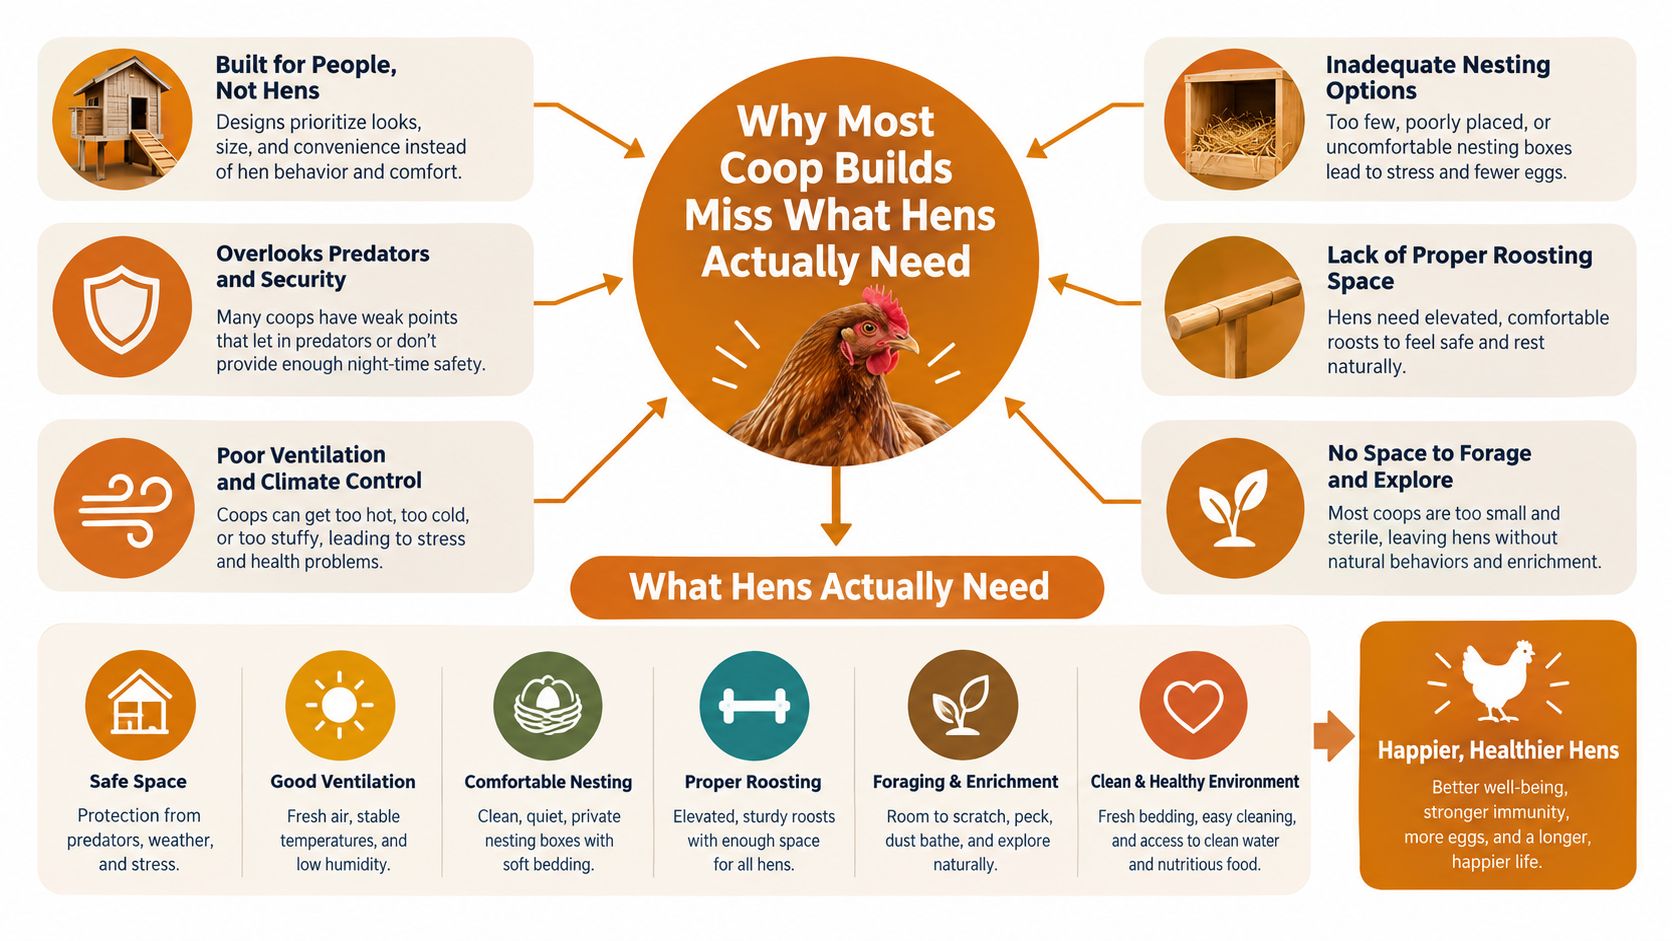
The best builds pass every decision through a behavioral question. Will a hen choose this spot when the run is busy? Can she enter without being pushed aside? Does the box stay darker than the rest of the coop? Is it below the roost so she won't treat it as a bed? Can you inspect it without dismantling half the wall?
Those questions matter more than decorative trim. A plain box in a quiet, dry corner usually outperforms a beautifully finished box mounted in the wrong place. If the first eggs land on the floor, don't immediately rebuild the entire coop. Watch when and where the hens lay, then adjust light, bedding, access, or height one factor at a time.
Planning the Coop Around Your Flock and Climate
A coop can look spacious on paper and still frustrate hens once they move in. Start with the flock, then fit the building around their habits. Count the hens, account for heavy breeds, and consider how much room the run provides. A layout that suits calm standard hens may become crowded when larger birds compete for roosts, floor space, or access to feed.
The site will shape daily use as much as the floor plan. Choose ground that drains instead of a low pocket that stays muddy, and use the slope to carry water away from the entrance. In cold, wet weather, turn openings away from driving wind and give exterior nesting-box hatches a generous roof overhang. In hot weather, provide shade and cross-ventilation, particularly on walls exposed to strong afternoon sun. Hens will avoid a box that becomes damp, glaringly hot, or uncomfortable to reach.
Set the dimensions before buying materials
Use the figures below as practical starting points, then adjust them for the flock and weather. They are planning heuristics, not guarantees. A hen that spends long periods indoors needs more usable room than one with a dry, spacious run, and a timid bird may need more access than the average measurement suggests.
| Feature | Starting point per Hen | Adjust For |
|---|---|---|
| Coop floor space | About 4 square feet as a planning starting point | Larger breeds, long winters indoors, and birds that spend more time inside. Guidance |
| Roost space | About 10 inches as a planning starting point | Heavy breeds, dominant birds, and multiple roost levels. |
| Run space | About 8 to 10 square feet as a planning starting point | Wet ground, limited ranging, and high-traffic feeding areas. |
| Nesting boxes | Roughly 1 for every 3 to 4 hens as a planning starting point | Bullying, broody birds, and hens that queue for the same favorite box. Placement guidance |
Draw the coop at full scale on graph paper before buying materials. Include the door swing, roosts, feeder, waterer, nest access, and the route your shoulders take during cleaning. A human-sized access door, removable roosts, and a hinged wall or roof panel often save more time than decorative features. If you cannot reach the back corner without crawling through litter, cleaning will become a task you postpone.
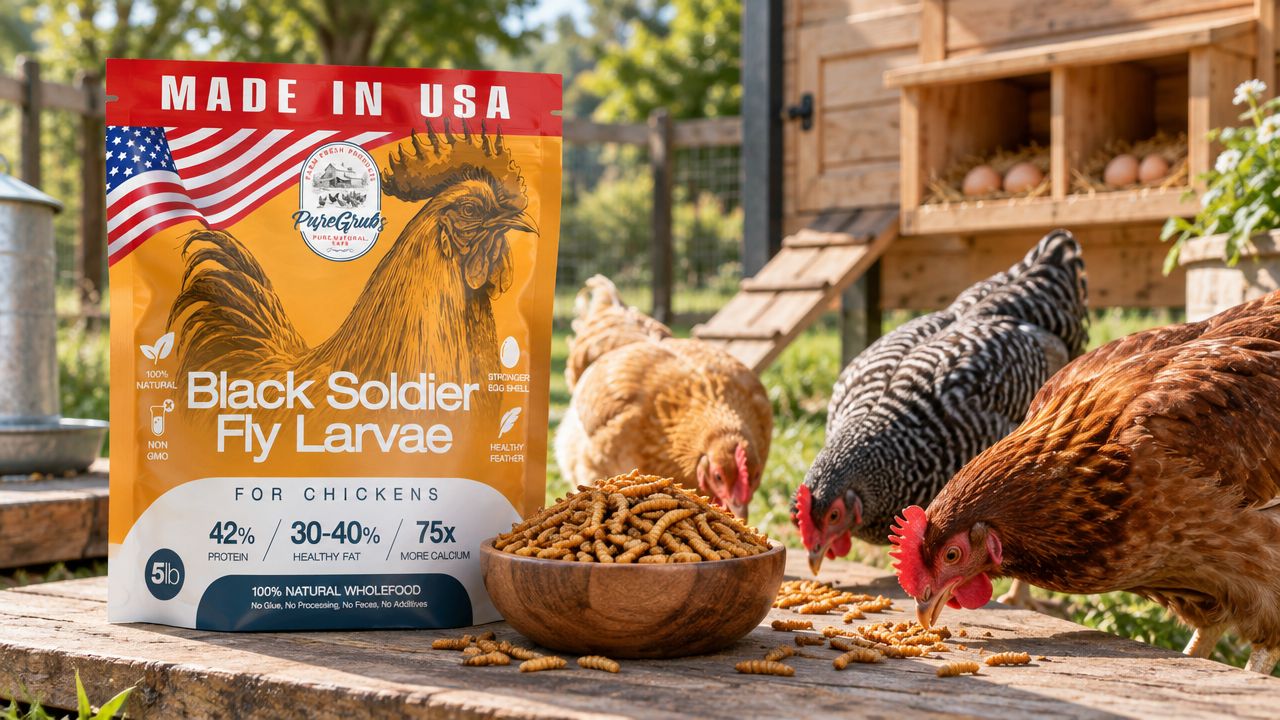
Nutrition does not correct poor housing, but treats can help with handling and flock movement. USA GROWN BLACK SOLDIER FLY LARVAE FOR CHICKENS are described in the catalog as dried, USA-grown larvae with up to 85% more calcium than mealworms. Use supplemental feed within a balanced poultry diet, never as a substitute for dry, accessible, well-planned housing.
Building the Coop Frame, Walls, and Roof
A coop can look square and sturdy yet frustrate you every morning if the door drags, the floor stays wet, or hens cannot settle comfortably inside. Build from the ground up in an order that keeps each later task reachable. Set pressure-treated skids on a level gravel base, check them in both directions, and frame the floor with 2x4s before sheathing it with 3/4-inch plywood. Raising the base reduces splashback and gives the walls a dry, stable starting point.
Use stud walls tall enough for you to stand while scraping, inspecting, and carrying bedding. Hens benefit from the extra working room too, since cramped human access often means dirty corners stay dirty. Green lumber can twist as it dries, opening siding seams and pulling fasteners out of alignment. Cheap hinge screws create the same false economy. Exterior-rated screws, heavy hinges, and well-supported doors cost less than rehanging a sagging access panel after a season of rain.
Seal the shell before installing the flock
Sheath the walls with exterior-rated panels, seal the seams, and prime every cut end before exposure. Shape the roof so rain and snow discharge away from the run door, rather than onto the threshold where mud and wet bedding will follow you inside. Place 30-pound felt or synthetic underlayment beneath metal or shingle roofing, then extend the eaves roughly 12 to 18 inches, adjusting for local wind-driven rain. That overhang keeps siding and nest openings drier, which makes those spaces more likely to remain usable after storms.
Cut openings for nest boxes and roost pockets before installing the siding. Trimming them later from a ladder while protecting finished cladding is how a straightforward job consumes a Saturday afternoon. For practical joinery and small-structure ideas, find woodworking project inspiration before choosing a door, hatch, or removable-panel design.
The same attention belongs inside. Make the nesting-box wall accessible from outside if that suits your site, while keeping the interior free of sharp screw points and unfinished edges. A hinged side wall or roof panel gives you a direct route to manure and spilled bedding. Seal exterior seams with suitable caulk, and cover exposed plywood edges before repeated moisture can swell them.
A collection of chicken coop designs can provide layout ideas, but copy the functional details rather than the appearance. Hens will use the roofline that keeps their area dry, the hatch you can open with gloved hands, and the cleaning panel you can reach without crawling through litter. A good frame serves those behaviors first.
Designing Nesting Boxes Hens Will Use
A box can look perfectly square and still sit empty while hens crowd into one corner or lay on the floor. Design around how birds choose a laying spot, then make that choice easy to repeat.
Standard laying hens generally accept an interior nesting space of 12 x 12 x 12 inches, while larger breeds often need 14 x 14 x 12 inches to reduce crowding and broken eggs, according to this nesting-box sizing guide. Treat those dimensions as a working baseline. A heavy hen in a cramped box can flatten the bedding, damage an egg, or abandon the box altogether.
Plan for roughly one box for every three to four hens, then watch the flock rather than trusting the ratio alone. A dominant hen may guard the darkest, quietest box and leave the others unused. Keep the lowest box about 18 inches above the floor, place the roost higher than the nests, and avoid stacking beyond about three levels. Excess height can turn the top box into an awkward climb instead of an inviting laying site. Placement recommendations offer practical guidance for arranging boxes in backyard coops.
Make the box feel like a nesting place
Fit a front lip that holds bedding without making entry difficult. A rear ledge keeps eggs and nesting material from sliding through the back gap. Pine shavings, clean straw, and rubber nest pads can work if they stay dry. Begin with 2 to 3 inches of clean bedding, then remove wet clumps and droppings when you find them. Extension housing guidance links clean, dry nesting material with cleaner eggs.
Hens usually prefer a nest darker than the main coop and protected from direct drafts. A golf ball or artificial egg can show pullets where to settle, while one clean egg may reinforce the location. Fix the boxes in place once laying begins. Repeated changes can send birds searching for another spot, especially during their first week in a new coop.
A week or two of floor-level familiarization can help with stubborn refusals. Set the box on the floor temporarily, let the hens inspect and enter it, then mount it at the planned height after they recognize it as a laying site. Behavior and nesting-box guidance also advises keeping boxes below the roost and away from sleeping perches, since hens that sleep in nests soil bedding and eggs overnight.
For mounting details, consult this guide to how high chicken nesting boxes should be. Accessibility, privacy, dryness, and separation from the sleeping area matter as much as an exact measurement.
Watch this practical demonstration after checking the dimensions and mounting plan:
Choosing Between Standard and Roll-Out Nest Boxes
A standard side-mounted box works well when hens can be checked on a dependable routine. It is straightforward to build, easy to retrofit, and forgiving when measurements are slightly off. Bedding can be replaced by hand, eggs can be collected directly, and birds are easy to inspect. Hens also make the trade-off clear: if collection is delayed, they may step on eggs, kick bedding over them, or settle in the box and soil it.
Roll-out boxes change the hen's contact with the egg. A sloped floor carries each egg into a covered trough outside the nesting area, reducing access for pecking and limiting contact with manure when collection is delayed. The mechanism demands more accurate construction. The slope, dividers, trough cover, and entry edge must meet cleanly, and some hens hesitate if the floor feels unstable or too steep.
| Factor | Standard Side-Mounted Box | Roll-Out Box |
|---|---|---|
| Build difficulty | Simple carpentry and easy retrofit | More precise floor, trough, and divider work |
| Daily labor | Eggs need regular direct collection | Eggs gather in a protected collection area |
| Bedding | Easy to add and replace by hand | Still needed, although the collection area separates eggs |
| Hygiene | Depends heavily on dry bedding and collection routine | Can reduce direct egg contact with hens and manure |
| Egg eating | Eggs remain available inside the nest | Reduced access can discourage pecking |
| Best fit | Small flocks and keepers who collect routinely | Larger flocks or irregular collection schedules |
A roll-out design becomes more attractive for flocks exceeding about 25 hens, or whenever daily collection is unreliable. It can also suit hot climates where eggs may sit exposed for extended periods. The design still needs regular attention. Inspect the nesting area, replace dirty bedding, and clean the collection trough, including a thorough cleaning at least monthly.
Builder's judgment: Choose roll-out when you cannot reach the coop at the same time each morning. Choose standard when you can, because fewer moving parts means fewer surfaces and mechanisms to clean.
Test any roll-out floor with an egg before mounting it permanently. Run the egg through the path by hand and check for sharp transitions, exposed fasteners, or gaps that stop the egg. Make sure the trough hides eggs from hens while keeping them accessible to the keeper. A standard box built correctly will outperform a complicated roll-out box that jams, traps bedding, or teaches hens to avoid the nest.
Ventilation, Insulation, and Predator-Proofing
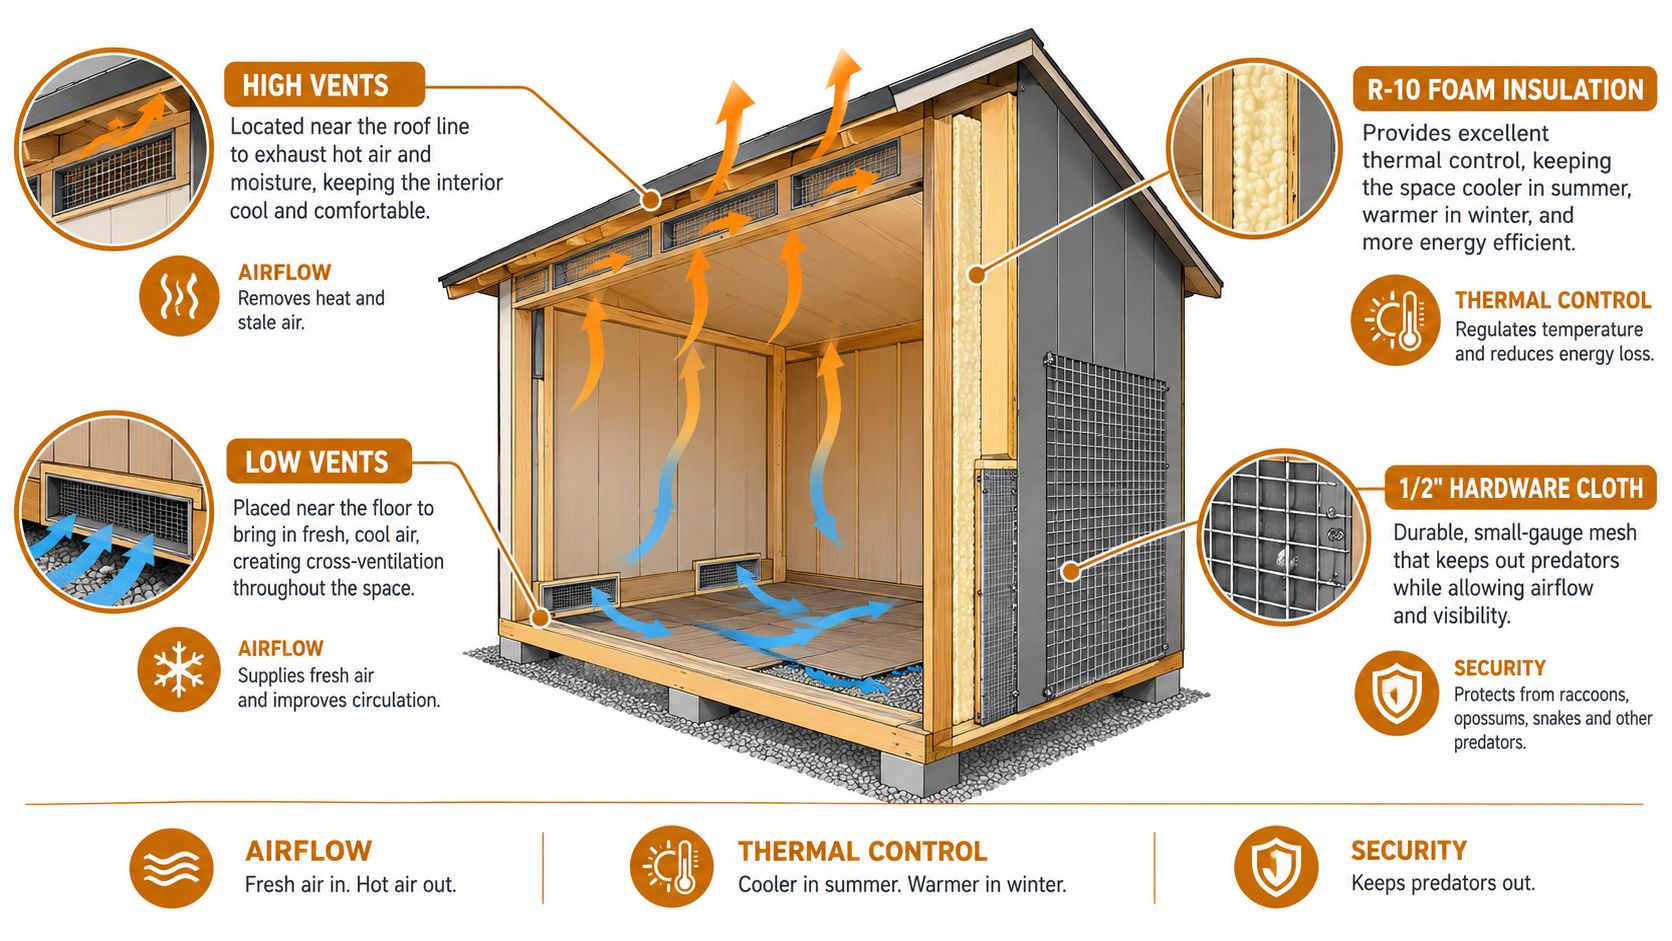
A coop can look tightly built and still leave hens damp, chilled, or reluctant to settle. Put high vents near the roofline to release warm, humid air, then add lower intake openings on opposite walls. Air should move through the building without blowing directly across roosting birds. A common starting point is about 1 square foot of opening per 10 square feet of floor area, adjusted upward in humid climates. Cover every opening with hardware cloth.
Use storm flaps or protected overhangs where driving rain can enter. Test airflow at roost level with your hand on a cold evening. Moist air should escape above the hens. A cold stream hitting their backs will make an otherwise attractive roost uncomfortable.
Keep the dry envelope intact
Rigid foam board between wall studs can improve thermal control, provided it is sealed behind interior plywood. Hens will peck exposed foam, especially when bored or confined by bad weather. Seal gaps around panels, corners, and service openings. Spray foam is useful only when fully enclosed. Careless application leaves material birds can reach and makes later repairs difficult.
Predator resistance starts at the ground. Bury hardware cloth around the run or install a broad apron that blocks digging along the fence line. Reinforce corners and close roof edges. Choose latches that raccoons cannot open with one simple movement. A latch requiring two motions is usually more dependable than a decorative hook.
Cleaning access connects these decisions. Damp litter reduces insulation performance, increases odor, and creates a better hiding place for rats or weasels. Build access so you can remove bedding without disturbing insulation, mesh, or nesting boxes. If cleaning is awkward, it gets postponed, and hens quickly show the difference between a coop that looks finished and one that stays dry.
Final Checks and Common First-Month Problems
Before the hens arrive, walk through the coop in the same order you'll use it every day. Confirm that the roost sits higher than the nesting boxes, the human door clears the threshold, every latch closes firmly, and the bedding is deep enough to cushion eggs without filling the entry. Check that feeders and waterers don't force birds to walk through the nesting area, and inspect every opening from the perspective of a determined rat or raccoon.
The first month usually reveals small behavioral mismatches rather than a total design failure. Use the symptom as a clue.
- Hens sleep in the boxes: Block the boxes after dark, improve the roost, and reopen them before the laying period. Check that the roost is higher and more comfortable.
- Eggs appear on the floor: Darken the boxes, add a fake egg, and inspect for drafts or aggressive hens guarding the entrance. A box that feels exposed often loses to a quiet floor corner.
- Laying stops suddenly: Check for stress, illness, temperature discomfort, disturbance, or a draft at roost level before changing the nest design. Healthy housing can't explain every production change.
- Feather picking starts near the boxes: Look for crowding, a blocked entrance, or one bird controlling the preferred box. Add another usable box or change the approach path.
- A broody hen refuses to leave: Make sure food and water are easy to reach, then inspect the box for heat, moisture, and excessive disturbance. A broody bird may need separate management from the main nesting routine.
For sanitation, inspect bedding daily and replace wet or fouled material promptly. Plan at least a weekly inspection or replacement routine, then increase it when humidity, rain, deep litter, sleeping hens, or brooding birds introduce more moisture and manure. Backyard chicken care guidance emphasizes that cleaning needs change with behavior and conditions, not just the calendar.
A working coop is a conversation between the structure and the flock. Watch what the hens choose, then adjust the smallest thing that solves the problem.
Give the birds time to establish a routine, especially after moving them into a new building. A dimmer box, a better lip, a relocated roost, or a drier handful of bedding can change the result without rebuilding the wall. The coop passes when hens reliably choose the boxes and you can keep those boxes dry, clean, and easy to service.
Pure Grubs offers USA-grown dried Black Soldier Fly Larvae that can be used as a supplemental treat while you manage flock handling and condition. If that fits your feeding routine, visit Pure Grubs to review the available chicken-larvae option and choose a practical addition to your coop routine.