
Breeding Chickens for Eggs: Expert Tips to Maximize Production
Breeding your own chickens for eggs is an incredibly rewarding experience. It puts you in the driver's seat, giving you total control over your flock’s genetics, health, and the quality of every egg they lay. When you select the best layers and raise your own chicks, you’re not just getting eggs; you're building a sustainable, highly productive flock that’s perfectly suited to your goals, whether that's a basket of rainbow-colored eggs or just consistent daily production.
Why Breed Your Own Egg-Laying Chickens
Deciding to breed your own chickens is about so much more than just having a steady supply of eggs. It’s a real, hands-on step toward self-sufficiency and a deeper connection to where your food comes from. You go from being a consumer who buys chicks to the architect of your flock's entire future.
This journey allows you to hand-pick the traits you value most. You can literally curate a flock that lays a stunning variety of eggs—from rich, chocolatey browns to sky blues and olive greens. On the other hand, maybe your goal is pure efficiency. In that case, you can select only your most reliable, prolific hens to pass on those powerhouse genetics.
The Tangible Benefits of a Homegrown Flock
Beyond the satisfaction of shaping your flock's genetics, breeding your own birds comes with some very practical upsides. You have complete oversight of their health from the moment they hatch, which means you can raise them in a clean, low-stress environment. This single step helps you sidestep the biosecurity risks that can pop up when you bring in adult birds from other farms.
You also get full control over their diet, a critical factor in egg quality. Giving your breeding stock top-notch nutrition doesn't just keep them healthy; it directly impacts the health and vitality of their chicks. For a deeper look into this, check out our guide on what to feed laying hens to get the most out of their health and production.
- Genetic Improvement: You get to continuously select for the best qualities, like high egg output, strong disease resistance, and even a calm, friendly temperament.
- Cost Savings: In the long run, raising your own replacement pullets is almost always cheaper than buying new ones every year.
- Enhanced Self-Sufficiency: You’re essentially creating a closed-loop system. Your flock sustains itself, meaning you don't have to rely on outside hatcheries.
This chart really breaks down the main reasons why so many backyard chicken keepers decide to start their own breeding programs.
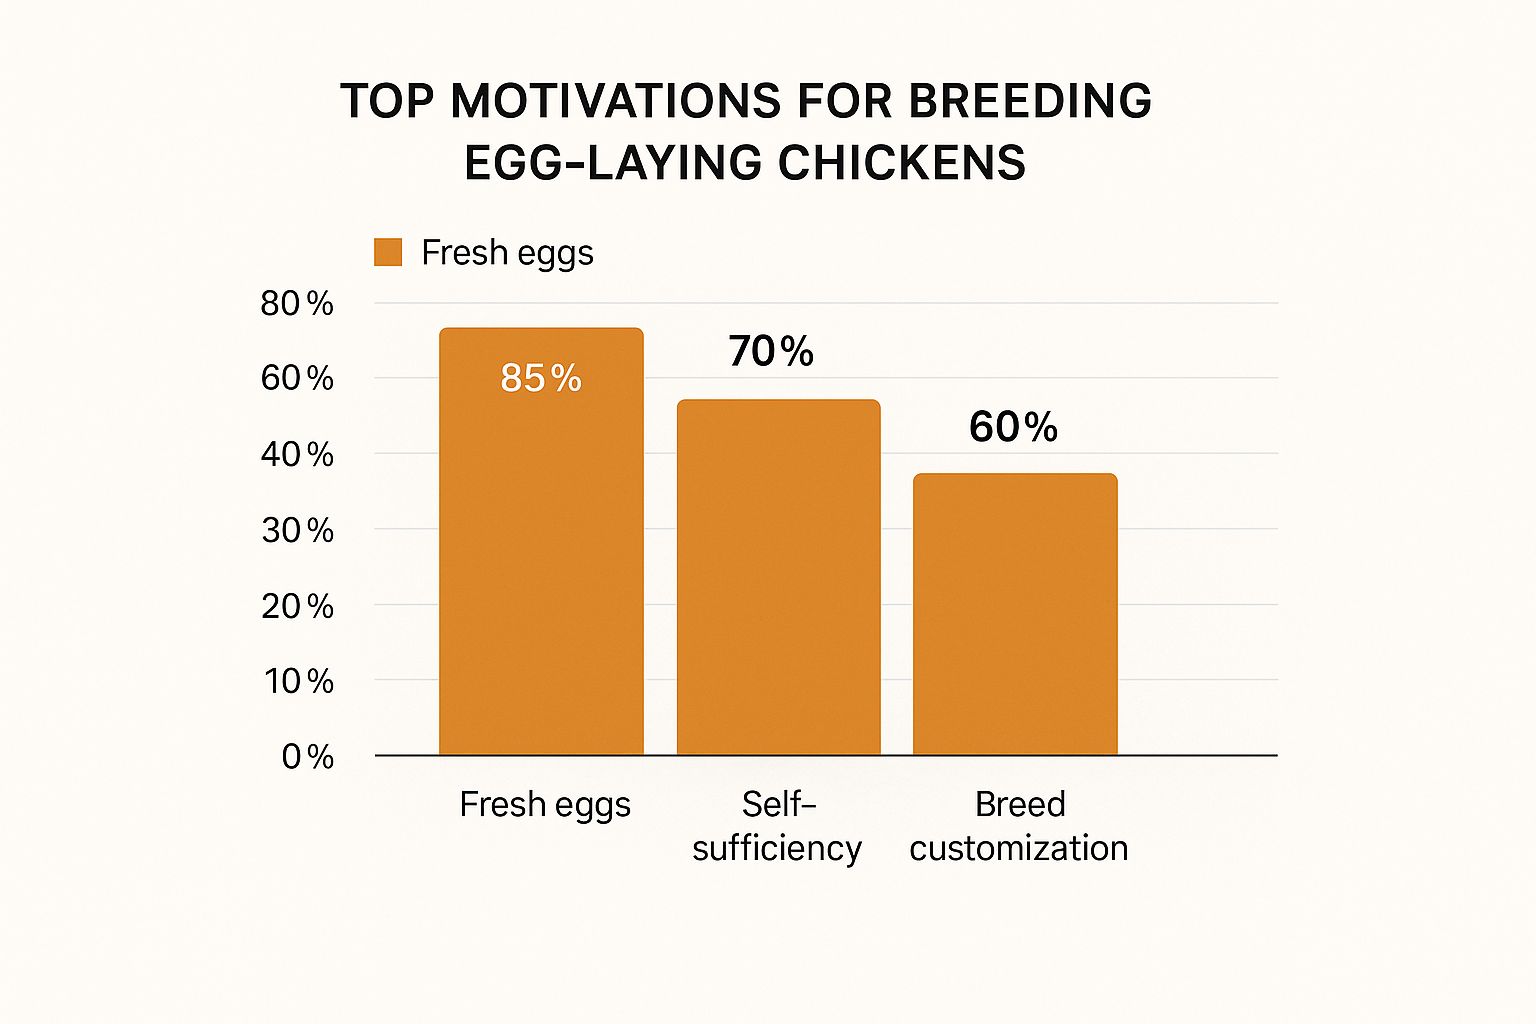
As you can see, the desire for fresh, high-quality eggs is the number one driver. It’s followed closely by the appeal of self-sufficiency and the fun of customizing breeds.
Breeding gives you the ultimate quality control. You know exactly what went into raising your birds—from their feed and living conditions to their overall well-being—which translates directly to the quality of the eggs on your table.
This move toward backyard sustainability is part of a much bigger picture. The global egg market was valued at USD 150.83 billion and is expected to climb to USD 222.86 billion by 2032. This reflects a huge and growing consumer demand for protein-rich, ethically sourced food.
Choosing Your Foundation Flock for Egg Production
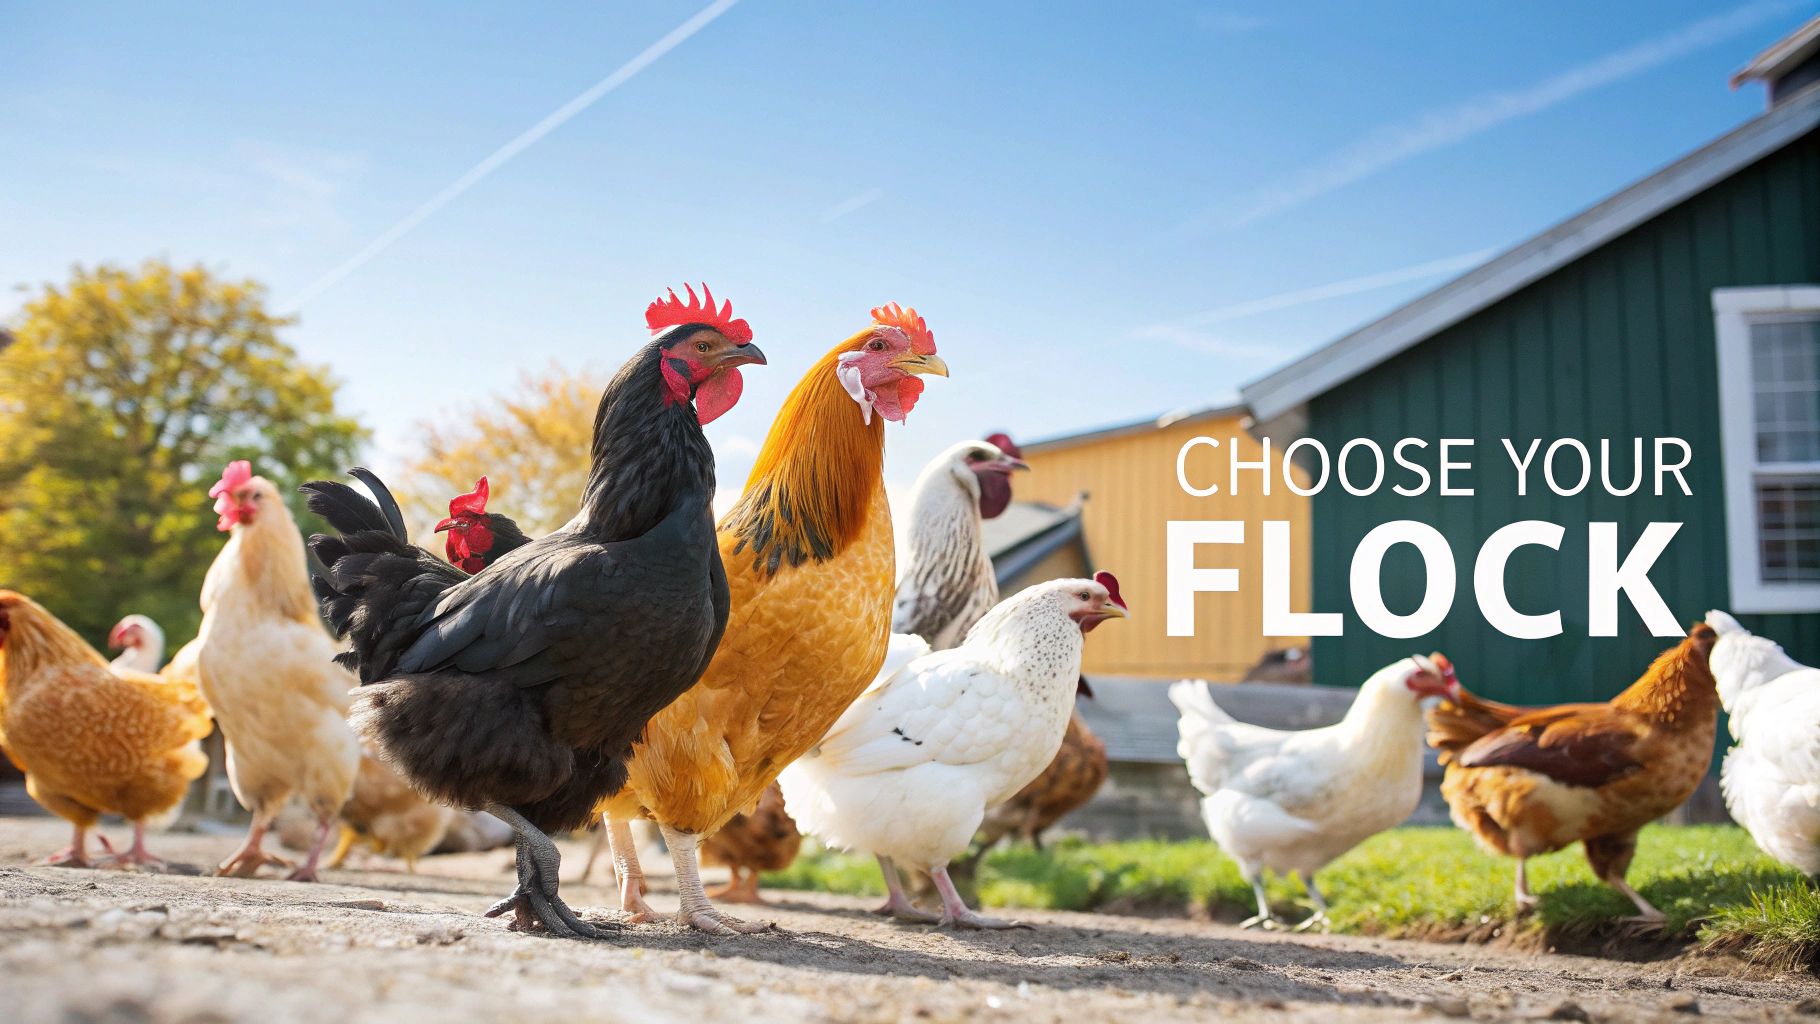
Your entire journey of breeding chickens for eggs really hinges on one big decision right at the start: picking the right birds. This choice is more than just about pretty feathers; it’s the genetic blueprint for your future flock, shaping everything from how many eggs you’ll get to how your birds handle a cold snap.
Think of it like building a house. You wouldn't pour the concrete without a solid plan and good materials. Your foundation flock is that cornerstone—get it right, and you're setting yourself up for a successful, sustainable breeding program that actually meets your goals.
Heritage Breeds vs Production Hybrids
One of the first forks in the road is deciding between heritage breeds and modern production hybrids. There's no single "best" choice; it all comes down to what you want out of your flock.
Heritage breeds, like the Wyandotte or Plymouth Rock, are the marathon runners of the chicken world. They've been around for generations, bred for hardiness, longevity, and the instinct to forage for their own food. They might lay fewer eggs per year than a hybrid, but they often keep laying consistently for many more years.
On the other hand, production hybrids like the Golden Comet or ISA Brown are the sprinters. They've been meticulously bred for one purpose: to lay an incredible number of eggs in their first 1-2 years. The trade-off is a much shorter productive lifespan, and they rarely go broody, so don't count on them to hatch their own chicks.
There’s also a great middle ground with dual-purpose breeds. Birds like the Orpington or Sussex provide a respectable number of eggs and are also meaty enough to be practical for the dinner table, making them a fantastic choice for homesteaders aiming for self-sufficiency.
A classic rookie mistake is picking a breed just because you saw a photo of their beautiful blue or chocolate-brown eggs. Always think about your climate first. A breed that thrives in the Texas heat might really struggle through a Wisconsin winter, which will tank its health and egg production.
Before you go all-in on a breed, it’s worth taking a look at how some of the most popular ones stack up against each other.
Top Egg-Laying Breeds Comparison
This table breaks down some of the top contenders, comparing their egg output, temperament, and what kind of weather they handle best.
| Breed | Annual Egg Production (Avg) | Egg Size/Color | Temperament | Best Climate |
|---|---|---|---|---|
| Leghorn | 280-320 | Large White | Active, Flighty | Adaptable, excels in heat |
| Rhode Island Red | 250-300 | Large Brown | Hardy, Curious | Cold and Heat Tolerant |
| Sussex | 250-300 | Large Cream/Brown | Docile, Friendly | Cold Hardy |
| Plymouth Rock | 200-280 | Large Brown | Calm, Gentle | Cold Hardy |
| Australorp | 250-300 | Large Brown | Docile, Quiet | Adaptable, good in heat |
| Golden Comet | 300-330 | Large Brown | Friendly, Energetic | Adaptable |
As you can see, you don't have to sacrifice a friendly personality for high production. The key is finding the right balance for your specific needs.
Identifying Healthy Breeding Stock
Once you’ve got a breed (or two) in mind, the next mission is finding healthy, high-quality birds. Whether you’re buying from a local breeder down the road or a well-known hatchery, knowing the signs of a vigorous chicken is crucial.
When I go to look at potential breeding stock, I run through a mental checklist. I’m looking for birds that are active and curious, scratching around and interacting with their flock mates. A chicken that's hunched in a corner or seems lethargic is an immediate red flag for me.
Here are the specific physical traits I zero in on:
- Clear, Bright Eyes: Their eyes should be sharp and alert, with no discharge, bubbles, or cloudiness.
- Clean Nostrils and Beak: Any gunk or a runny nose is a bad sign. You also don't want to see them breathing with their mouth open, as that can point to respiratory trouble.
- Smooth, Clean Legs: Check the scales on their legs and feet. If they're raised or look crusty, it could be a sign of scaly leg mites.
- Full, Glossy Feathers: A healthy bird's feathers lie flat and have a nice sheen. Big patches of missing or ragged feathers can mean anything from parasites to stress or bullying.
This initial health screening is non-negotiable. Bringing home a sick bird can derail your whole breeding program before it even starts, introducing diseases that are a nightmare to get rid of.
Selecting Your Rooster and Hens
With a group of healthy birds in front of you, the final piece is choosing the specific individuals for your breeding pens. For a rooster, his personality is every bit as important as his good looks. An overly aggressive roo can injure your hens and make collecting eggs a daily battle. A timid one, however, might not get the job done at all.
I look for a rooster who is attentive to his girls—a great sign is "tidbitting," where he finds a tasty morsel and calls them over to share it. He should be confident but also respectful of your space.
When it comes to the hens, the signs of a great layer are subtle but clear once you know what you’re looking for. A top-producing hen will have:
- A Wide Pelvic Span: Gently feel the area between her pelvic bones, right below the vent. On a hen that's actively laying, you should be able to fit 2-3 fingers between those bones. If it’s narrow, she’s not in lay.
- A Moist, Faded Vent: The vent of a productive layer will be wide, moist, and often bleached of its natural color because of the sheer volume of eggs passing through.
- Faded Legs and Beak: For yellow-skinned breeds, the pigment that makes their legs and beak yellow gets redirected into making rich, golden egg yolks. So, a hen with pale, faded legs at the end of the season has been working hard for you.
By being picky and carefully selecting your foundation flock based on health, breed traits, and these signs of productivity, you're setting a powerful precedent for years to come.
Creating an Environment for Healthy Breeding
If you're serious about breeding chickens for eggs, your success is going to hinge on the environment you create. I can't stress this enough: a productive flock is a comfortable, low-stress flock. Their home—the coop—is the single biggest factor in encouraging natural breeding and keeping your hens in peak laying condition.
This goes way beyond just four walls and a roof. Every little detail, from the bedding in the nesting boxes to how high you hang the roosts, can either help or hurt your breeding goals. A thoughtfully designed space cuts down on squabbles, minimizes health risks, and simply makes your birds feel secure enough to do what they do best.
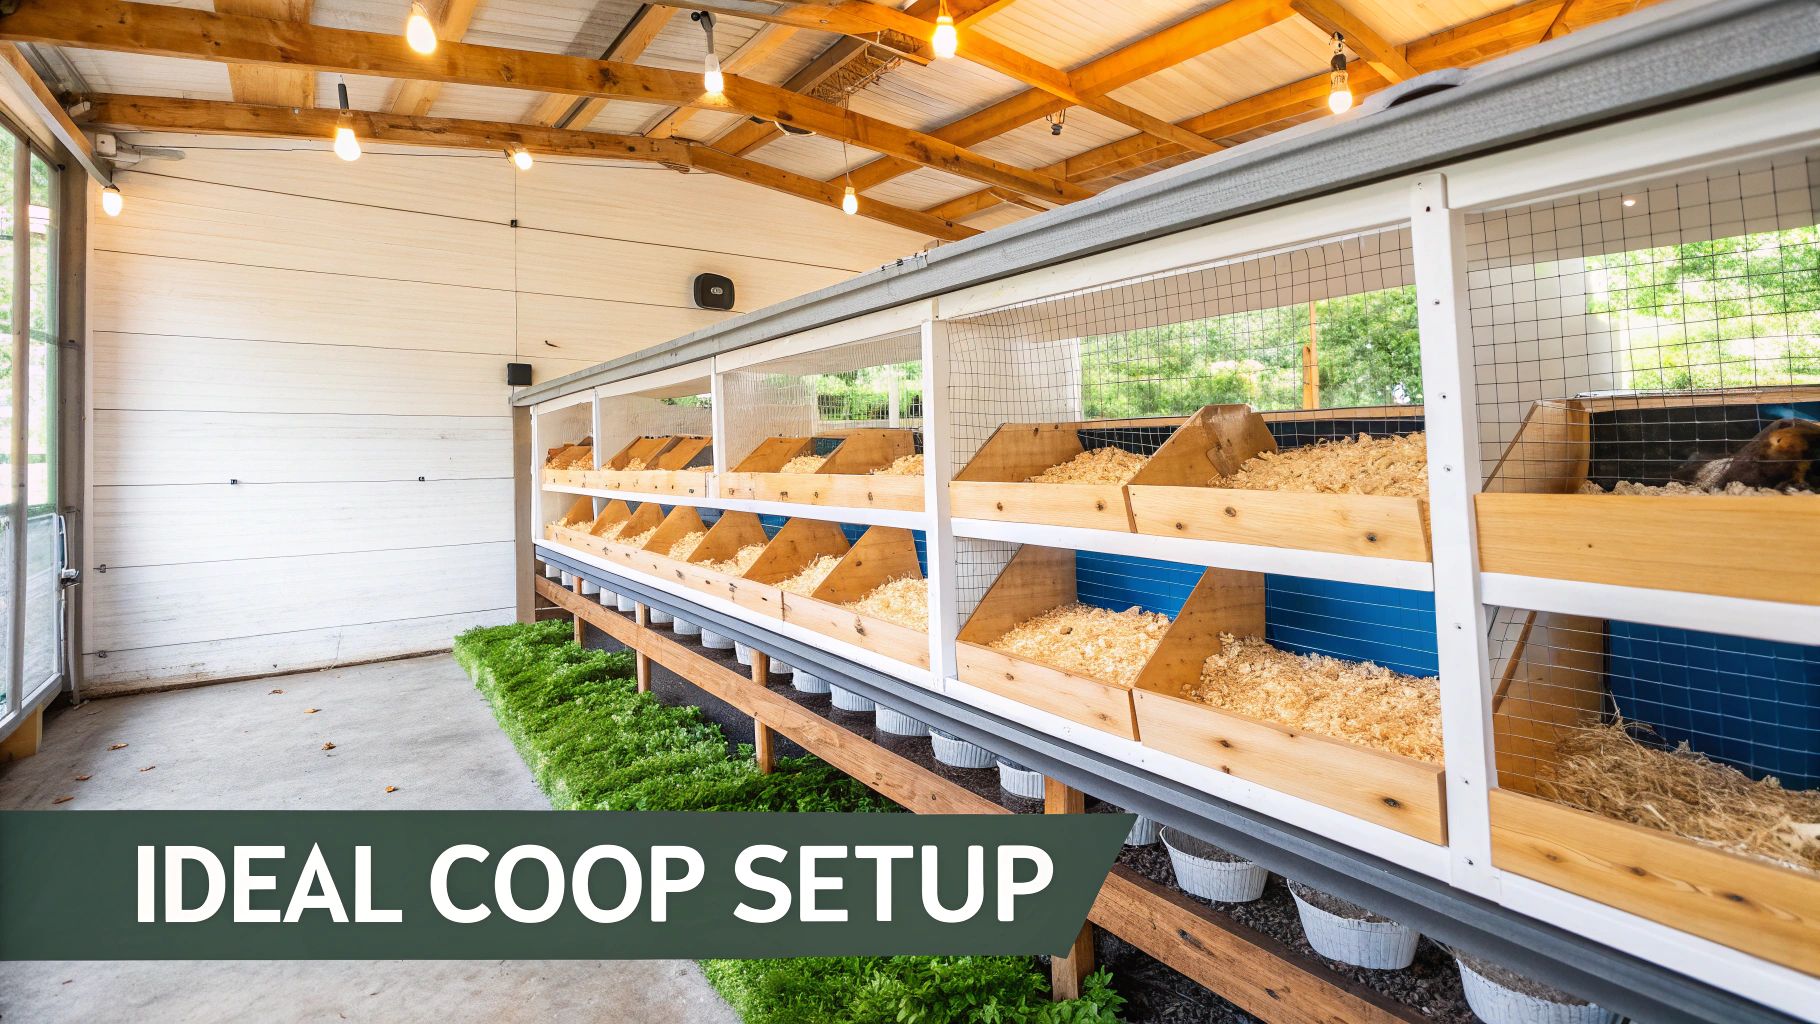
Optimizing Your Coop for Breeding
The chicken coop is the heart of your entire operation. When you're setting things up for breeding, a few key elements need extra attention to make sure fertility and hen health stay high.
Let's start with nesting boxes. A hen is looking for a quiet, dark, and private spot to lay. If she doesn't feel safe, she'll find somewhere else, or just hold off. I always stick to a ratio of one nesting box for every 3-4 hens, which seems to keep everyone from fighting over the "best" spot. My go-to bedding is a deep layer of soft pine shavings. They're super absorbent, comfy for the birds, and help keep the eggs clean—which is critical if you plan on hatching them.
Here's a simple tweak that pays off big time: perch placement. If you put roosts at different heights, you're just asking for nightly power struggles. I learned to install all my perches at the exact same level. This tiny change helps keep the pecking order peaceful at bedtime, dramatically cutting down on stress. And less stress almost always means more eggs.
A common mistake I see is people forgetting about the rooster's comfort. Make sure your coop has enough headspace and floor space for him to move around easily, especially if you have a larger breed. A cramped rooster is an unhappy rooster, and often a less effective one, too.
Nutritional and Lighting Adjustments
When you're feeding a breeding flock, a standard layer feed just won't cut it. Your hens absolutely need plenty of calcium for strong eggshells, but your rooster’s needs are different. In fact, too much calcium can actually damage his kidneys.
My solution is pretty simple. I provide calcium, usually crushed oyster shells, in a separate, free-choice feeder. This lets the hens take exactly what they need without forcing it on the rooster. During breeding season, I also bump up the whole flock to a higher-protein feed, somewhere in the 18-20% range. This gives both the hens and the rooster the extra fuel they need for good fertility and overall vigor.
Supplemental lighting is a complete game-changer, especially for getting through the shorter, darker days of winter. A hen’s laying cycle is triggered by daylight, and they really need about 14-16 hours of light each day to produce consistently. I use a cheap timer to turn on a low-wattage bulb in the coop before sunrise and have it stay on for a bit after sunset. This simple trick keeps the hens laying and gives me a steady supply of fertile eggs for the incubator all year round.
Maintaining Flock Health and Harmony
Bringing a new rooster into the flock can be pure chaos if you don't handle it right. Whatever you do, don't just toss him in with the hens. I use what I call a "see but no touch" method. I'll house the new guy in a separate pen right next to the main run for about a week. This lets everyone get used to his sight and sound without any actual physical conflict, making the final integration much, much smoother.
Finally, strong biosecurity is your absolute best defense against diseases that could decimate your flock and your breeding program. A few simple habits can make all the difference:
- Dedicated Footwear: Keep a pair of boots or shoes that you only wear in the chicken area. This is the easiest way to avoid tracking in nasty pathogens.
- Quarantine New Birds: Any new chicken, no matter where it came from, stays separate from my main flock for at least 30 days. This gives me time to watch for any signs of illness.
- Cleanliness is Key: I can’t overstate the importance of regularly scrubbing and disinfecting waterers and feeders. It’s the best way to stop harmful bacteria from getting a foothold.
These small, consistent efforts are what keep a breeding population truly healthy. On a larger scale, the U.S. egg industry has seen how quickly disease can wreck production. Not long ago, national egg production fell to 8.33 billion eggs, a drop that was partly due to Highly Pathogenic Avian Influenza (HPAI) hitting commercial flocks. Practicing good biosecurity, even on a small backyard scale, helps protect your own birds from similar disasters. You can discover more insights on U.S. egg production trends to see just how significant these impacts can be.
A Practical Guide to Incubation and Hatching
This is where the real magic happens. It’s the delicate, sometimes nerve-wracking, but always rewarding 21-day journey from a fertile egg to a peeping chick. Whether you decide to work with Mother Nature or modern technology, your job is to provide a stable, safe environment for that tiny life to develop.
You really have two main paths to choose from: letting a broody hen do all the heavy lifting or managing the process yourself with an incubator. Both methods work great. The best choice often just comes down to your flock's natural instincts and what you're trying to achieve.
Working with a Broody Hen
Some hens are just born to be mothers. The first trick is identifying a hen who is truly committed to sitting. You'll know she means business when she refuses to leave the nesting box, fluffs up her feathers like a defensive pincushion, and lets out a low, guttural growl if you get too close.
Once you’ve confirmed she’s serious, your job is simply to support her. A broody hen needs her own private, quiet space, well away from the daily traffic of the main coop. I often set up a separate "broody coop" or even a large dog crate in a calm corner of the garage. This stops other hens from bothering her or trying to lay more eggs in her nest, which can throw the whole incubation timeline out of whack.
Make sure she always has her own food and water nearby. She'll eat and drink a lot less than normal, but she has to be able to hop off the nest for a quick bite without feeling like her spot is threatened.
Mastering the Incubator
For those of us who want a bit more control (or just don't have a reliable broody hen), an incubator is an essential piece of kit. The market is flooded with options, but don't get overwhelmed. Success really just boils down to consistently managing two critical factors: temperature and humidity.
Think of your incubator as a high-tech surrogate mother. It doesn't have to be the fanciest model, but it absolutely must be reliable. For chicken eggs, the ideal settings are pretty universal:
- Temperature: 99.5°F (37.5°C) is the gold standard for most modern, forced-air incubators.
- Humidity: For the first 18 days, you’ll want to aim for 45-55%. Then, for the final three days of "lockdown," you'll need to crank it up to 65-75%.
That final humidity spike is absolutely non-negotiable. It softens the egg's inner membrane, making it much easier for the chick to break through the shell. Without it, you can run into heartbreaking issues like "sticky chicks" who get shrink-wrapped inside that membrane and can't hatch.
The most common incubator failure isn't a power outage—it's temperature fluctuation. Even a degree or two off for an extended period can seriously impact your hatch rates. I always run a new incubator for a full 24 hours before putting any eggs inside, just to make sure it holds a steady temperature.
The Candling Process: Checking for Life
One of the most exciting parts of incubation is candling—shining a bright light through the egg to watch the embryo develop. It’s your window into a hidden world, and it's also a practical way to remove any non-viable eggs that could go bad and contaminate the whole incubator. While you can technically candle as early as day five, things are much clearer by day seven.
My process is pretty simple:
- Day 7 Candling: I’m looking for the tell-tale sign of life: a web of developing blood vessels spreading out from a small, dark spot (the embryo). It honestly looks like a tiny, intricate spiderweb.
- Day 14 Candling: By this point, the embryo is much larger. You can often see movement as it shifts around inside the shell. The air sac at the blunt end of the egg will also have grown quite a bit.
If an egg just glows clear with no development, it's likely infertile. If you see a dark ring stuck to the inside of the shell, often called a "blood ring," it means the embryo started to develop but has died. For a fantastic visual guide on this, you can learn more about how to check if chicken eggs are fertilized and what to look for. Pulling these duds out early is a key step for a clean, successful hatch.
Navigating Hatch Day
As you get close to day 21, the whole process enters its final, crucial phase. The first "pip"—a tiny hole poked through the shell by the chick's egg tooth—is the signal that hatching is about to start. From that first little hole, it can take anywhere from 12 to 48 hours for a chick to fully emerge.
It is so tempting to "help" a chick that seems to be struggling, but you have to resist that urge. The chick is resting between pushes and absorbing the last of its yolk sac, which provides its first critical nutrients. Intervening too early can cause fatal bleeding. On hatch day, patience is your most important tool.
Once the chicks have hatched, leave them in the warm incubator for up to 24 hours. They need to dry off completely and get nice and fluffy before you move them to their new home in the brooder.
Raising Healthy Chicks Into Productive Hens

The future of your egg supply is chirping away in the brooder. Those first few weeks are absolutely foundational—they set the stage for a chick's lifelong health, growth, and how well she'll lay for you down the road. If you're serious about breeding chickens for eggs, getting this part right is everything.
Your main job is to play the role of a mother hen, providing warmth and security. It all starts with a well-prepared brooder. This doesn't need to be fancy; I've seen everything from large stock tanks and sturdy cardboard boxes to plastic totes work perfectly. The real key is creating a safe, draft-free space where your chicks can thrive.
Brooder Setup and Temperature Management
Of everything you'll manage, temperature is the most critical element in those first few weeks. Brand-new chicks can’t regulate their own body temperature, so they are completely dependent on an external heat source, usually a heat lamp or a radiant heating plate.
For the first week, you’re aiming for a consistent 95°F (35°C) directly under the heat source. Don't guess—get a digital thermometer and place it right at chick level for an accurate reading. From there, the rule of thumb is to reduce the heat by 5°F each week until you've matched the ambient temperature of your coop.
The best thermometer, though, is the chicks themselves. Watch their behavior. If they're all huddled tightly under the lamp, they’re telling you they're cold. If they’re scattered to the far edges of the brooder, panting, they’re too hot. Content, comfortable chicks will be spread out, peeping happily, eating, and drinking.
Bedding is another crucial piece of the puzzle. I strongly recommend using large pine shavings or hemp bedding. Please avoid slippery surfaces like newspaper. It can cause a heartbreaking condition called "splayed leg," where their little legs develop improperly. A deep, absorbent layer of good bedding keeps the brooder dry and gives them the footing they need.
Chick Nutrition for Optimal Growth
Just like any baby, chicks have very specific dietary needs that change as they grow. Giving them the right feed at the right time is vital for developing strong bones and a solid immune system—all of which directly impacts their future as prolific layers.
- Starter Feed (Weeks 0-8): This is a high-protein feed, usually around 20-24%, that gives them the essential building blocks for that initial, rapid growth spurt. You'll often see medicated starter feed, which can help protect against coccidiosis, a common and often deadly intestinal parasite in young birds.
- Grower Feed (Weeks 8-18): As they move into their awkward teenage phase, their protein needs dip a bit. Grower feed drops down to 16-18% protein and has less calcium than layer feed. This is important for proper kidney development before they start laying.
- Layer Feed (Week 18+): Once your pullets are nearing laying age, it’s time to switch to a proper layer feed. This formula has that necessary calcium boost to support strong, healthy eggshell production from day one.
Making sure your developing hens have plenty of calcium is paramount for a long and productive laying life. If you want to dive deeper into this, you can learn more about the best calcium supplements for chickens and how to offer them correctly.
The global demand for eggs is staggering. Worldwide egg production has soared to an estimated 99 million tonnes, a figure that has more than doubled since 1995. This boom is largely driven by developing nations, where eggs are an affordable and vital source of protein. China, for instance, is an absolute powerhouse, producing over 586 billion eggs annually. To get a sense of the scale of this industry, you can read the full research about global egg production and its market trends.
Integrating Pullets Into the Main Flock
Introducing your young pullets to the established flock is probably one of the most delicate social challenges in all of chicken keeping. The pecking order is serious business, and a clumsy introduction can lead to severe bullying, injury, and stress.
The goal is always a low-stress, gradual integration. I swear by the "see but don't touch" method for at least a week. Set up a temporary pen or even a large dog crate inside or right alongside the main run. This lets the old guard and the newcomers get used to each other's presence without any physical contact.
After a week or two of just looking at each other, the best time to make the final move is at night. Well after dark, when the main flock is roosting and docile, you can quietly place the new pullets onto the roosts right beside them. They'll wake up together in the morning, which often short-circuits much of the initial territorial drama. Just be sure to add extra food and water stations to prevent the older hens from guarding resources. A few squabbles are normal, but this method gives you the best shot at a peaceful integration.
Your Top Chicken Breeding Questions, Answered
Once you start breeding chickens for eggs, you’ll realize that every part of the process sparks a new question. I've been there! To help you out, I’ve put together answers to some of the most common questions I get from other chicken keepers.
Think of this as your quick-start guide for tackling the real-world puzzles that come up as you build and refine your own breeding program.
How Long Until a New Hen Lays Her First Egg?
That first egg is always a highly anticipated event, and how long you have to wait really comes down to the breed. High-production hybrids, like your Golden Comets or Leghorns, are bred to get going quickly and often start laying as early as 16-18 weeks old.
On the other hand, the bigger heritage breeds like Orpingtons or Wyandottes take their sweet time. They're built more for the long haul and might not start laying until they’re 24-28 weeks old. I like to think of hybrids as the sprinters of the chicken world, while heritage birds are the marathon runners, built for years of consistent production.
A quick tip from experience: good nutrition and a low-stress environment are everything when it comes to getting a pullet to start laying on time. If you’re seeing a delay, it's often a sign of a nutritional gap or social stress in the coop.
What’s the Best Rooster to Hen Ratio?
Getting the rooster-to-hen ratio right is a balancing act. It's key for high fertility but also for keeping the peace in your flock. The classic rule of thumb is one rooster for every 8 to 12 hens. This usually keeps all the eggs fertile without the hens getting stressed or losing feathers from too much attention.
But this isn't a hard-and-fast rule. I’ve noticed that with my smaller, more energetic breeds, I can push that ratio a bit higher. For my big, mellow Cochins, though, I keep it lower—around one rooster for every seven hens—just to make sure he can effectively look after his girls. The best thing you can do is watch your flock. They'll show you what's working.
Can I Mix Different Chicken Breeds Together?
You bet! Creating your own custom hybrids is one of the most rewarding parts of breeding. It’s how we get all those amazing and unique egg colors. For example, if you cross a Marans rooster (from a dark brown egg line) with an Ameraucana hen (who lays blue eggs), their daughters will likely lay stunning olive-green eggs.
Just know that cross-breeding is delightfully unpredictable—you'll get a unique blend of traits from both parents. If your goal is to preserve the specific qualities of a heritage or rare breed, though, you'll want to stick with purebred pairings to make sure the offspring stay true to their lineage.
How Can I Tell if My Eggs Are Fertile?
There’s no way to know just by looking at an egg from the outside. The only real way to check without cracking it open is to candle it after about a week of incubation.
Candling is just shining a bright light through the egg in a dark room to see inside. It’s an incredible little window into the development process.
- A Fertile Egg: After 5-7 days in the incubator, you’ll see a web of tiny red blood vessels spreading out from a small dark spot, which is the embryo.
- An Infertile Egg: It will just glow yellow or clear inside, with nothing going on.
Learning to candle is a non-negotiable skill if you're hatching your own eggs. It lets you pull out any eggs that aren't developing, keeping your incubator cleaner and giving the viable embryos more room to grow.
Want a treat that supports strong eggshells and a healthy flock? Give your birds the all-natural, high-calcium goodness of Pure Grubs. Our USA-grown grubs are a safe, premium supplement your chickens will go crazy for. Shop now at Pure Grubs.